How to Light Your Mantel Like a Pro with LED Décor Lights
- Posted on
- 0
To light your mantel like a pro with LED mantel decorating lights, choose warm white LEDs with a remote or timer, match the length to your mantel, then layer lights behind garland, décor, and candles for depth. Keep cords hidden and use safe run times.
Step 1. Pick the right LED light type for your mantel
Most mantels look best with one of these:
Cluster lights
These give a dense sparkle, great for garland and winter décor. Why this works: more light points means a richer glow. Next step: decide if you want a clear wire or green wire look.
Shop LED mantel decorating lights
“Snake” or flexible strand lights
These are easier to shape around objects and edges. Why this works: flexible strands help you outline curves and corners cleanly. Next step: choose the wire color that blends with your décor.
Battery-operated cluster lights
These help when you have no outlet nearby. Why this works: you avoid visible cords and reduce trip hazards. Next step: plan battery access so you can swap batteries fast.
Browse more options in the LED lights collection:
Step 2. Measure first so the lights look clean
Do this in 30 seconds:
• Measure mantel length in inches
• Add 12 to 24 inches so you have slack for drape
• Decide where the plug will go, left or right
Why this works: sizing first prevents bunching and “random droop.” Next step: pick one main strand length that fits your plan.
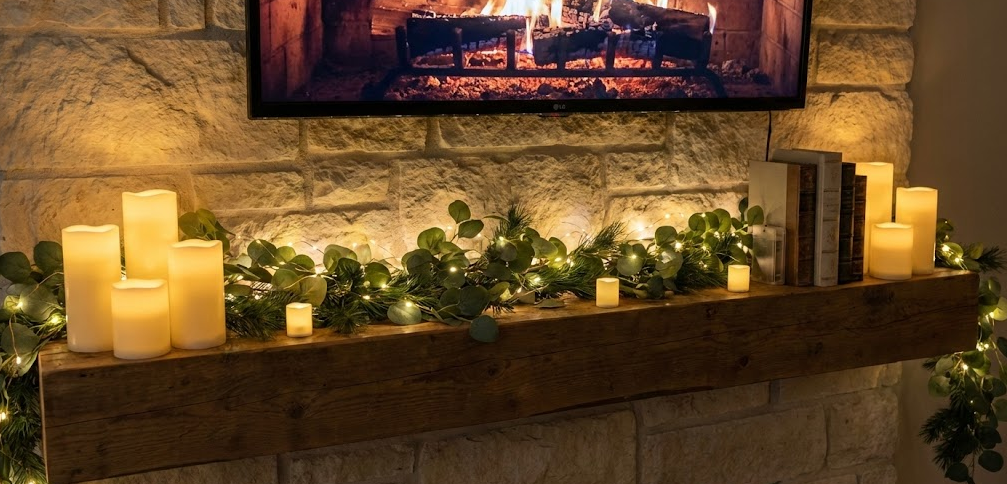
Step 3. Build depth with a simple 3-layer formula
Designers use layers. It keeps the mantel from looking flat.
Layer 1. Background glow Place LED lights behind your main items, close to the wall.
Layer 2. Main décor line Garland, greenery, or a row of pumpkins, trees, or seasonal accents.
Layer 3. Foreground highlights Candlesticks, frames, small figurines, or a statement piece in the center.
Why this works: the light bounces off layers and looks softer. Next step: place your largest items first, then tuck lights behind them.
Step 4. Hide cords and keep the wire invisible
Use simple tools:
• Clear adhesive hooks under the mantel lip
• Small zip ties on garland stems
• A cord cover if the outlet is far away
Why this works: the eye sees the glow, not the wiring. Next step: step back 6 feet and check for visible wire lines.
Step 5. Use a timer or remote to make it easy
If your lights have a remote or timer, use it. Set the same “on” time daily.
Why this works: consistency increases use, and lights only help if you turn them on. Next step: choose a daily window, like 5 pm to 10 pm, then adjust based on your routine.
If you are decorating beyond the mantel, explore Christmas lights for trees and displays:
Step 6. Match your light tone to the mood
• Warm white feels cozy and classic
• Cool white feels crisp and modern
• If your room has warm lamps, warm LEDs usually blend best
Why this works: mixed tones often look “off,” even if everything is pretty. Next step: look at your lamp bulbs, then match your LEDs to that tone.
Step 7. Make it safe and stress-free
Basic rules:
• Keep lights away from open flame
• Do not pinch cords under heavy décor
• Check wires before each season
• Use indoor or outdoor rated lights for the right space
Why this works: safety builds trust and keeps décor worry-free. Next step: do a quick wire check before final styling.
FAQs
How many lights do I need for a mantel?
A common starting point is one strand that covers the mantel length plus extra for drape. Dense cluster styles look fuller with fewer strands.
Are LED mantel decorating lights only for Christmas?
No. They work year-round. Use them with greenery, framed art, or seasonal décor.
Should I use battery or plug-in lights?
Use battery when outlets are hard to reach. Use plug-in when you want stronger, longer lighting with less battery swapping.
How do I keep lights from looking messy?
Measure first. Use hooks. Build layers. Hide the wire behind décor.
Conclusion
A pro-looking mantel is not about more stuff. It is about the right LED lights, clean placement, and simple layers that create depth. Start with one good strand, measure your space, hide the cord, then style around the glow.
Comments
Be the first to comment...