

The Last Straw Blog
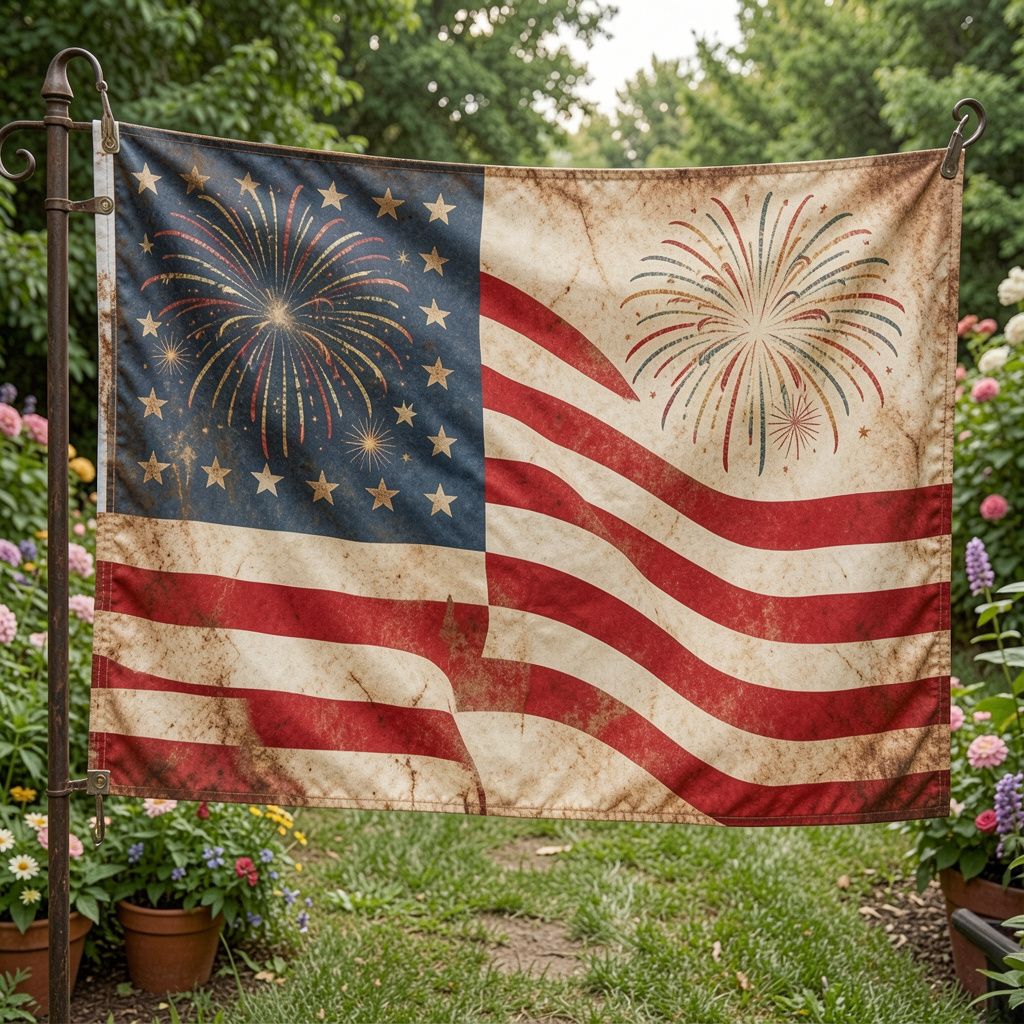

Summer Garden Flags: From Spring Florals to July 4th
Summer is the easiest season to keep your entryway and garden looking intentional, because a single swap of seasonal garden flags can carry your outdoor styling from late spring right through July 4th and beyond. The best approach is to treat your flag like a "mini front-porch refresh": start with spring floral garden flags as the weather warms, transition to bold sunflowers and bright colors as school lets out, then finish strong with a patriotic garden flag for Independence Day. What makes a great summer garden flag? Summer brings intense sun, surprise storms, and plenty of foot traffic (kids, pets, guests), so durability matters as much as design. When you're choosing summer garden flags, focus on three practical factors: fabric performance, readability, and size/fit. • Fade resistance: Summer sun can wash out cheaper prints quickly. Look for fade-resistant inks and outdoor-rated polyester. • Double-sided readability: A flag that reads correctly from both sides looks polished from the street and from your walkway. • Standard small-flag sizing: Many porch and flower-bed displays use the 12" x 18" (or similar) small garden flag format for easy swapping. Start with spring florals that still feel right in early summer The sweet spot for late May through mid-June is floral and garden-themed art that feels fresh—but not overly "Easter." That's why spring floral garden flags with geraniums, wellies, birds, and mixed bouquets transition so naturally into summer. A reliable option is the Spring Garden Flag (11-Styles) collection (typically $14.99–$15.99). These are made from BreezeArt™ SolarSilk® 600 denier polyester in a 12.5" x 18" size, designed to be fade and mildew resistant with a soft drape, and they're readable from both sides. That combination is ideal if your flag will be exposed to morning dew, sprinkler mist, or heavy sunshine. Easy early-summer style pairings • Geranium or flower-bucket artwork: Pair with real or faux geraniums, a coir doormat, and a simple black lantern by the door. • Birds and bees themes: Coordinate with a small wreath or pot of lavender for a cottage-garden feel. • Gingham accents: If your porch leans farmhouse, a gingham-based design looks crisp all summer long. Move into true summer: sunflowers, sunshine, and bold color Once the heat settles in, brighter graphics look best—especially at the curb. Mid-summer designs often feature sunflowers, outdoor sayings, fireworks, and vivid sky blues that pop against green lawns and darker mulch. The Summer Garden Flag (6-Styles) assortment is designed specifically for this part of the season, priced around $13.99–$14.99 (average $14.62, with some styles occasionally out of stock). These flags are double-sided with fade-resistant ink on a luxurious velvety heavyweight fabric, and they're printed in the USA. In practice, that means they tend to hang nicely (not stiff and crunchy) while still holding up to outdoor conditions. Best "everyday summer" looks • Happy Sunflowers / Sunflower on Blue: Great for July through August, especially near hydrangeas or boxwoods where yellow really stands out. • Life is Good: Works well for casual lake-house or backyard patio vibes. • Hanging Geranium / Wildflower Bucket: Perfect if you want a floral look that feels more "June garden" than "springtime." Go patriotic: Fourth of July garden flags that don't feel overdone A patriotic garden flag is one of the simplest ways to mark the holiday without committing to a full porch overhaul. The trick is choosing artwork that reads clearly from the street and still feels tasteful when it's up for more than just one weekend. For a classic seasonal swap, look for Fourth of July garden flags with stars, stripes, or fireworks motifs. In the Summer Garden Flag collection, styles like Fireworks & Flags or Under the Stars capture that festive look while staying versatile enough to keep up from late June through mid-July. Patriotic styling that looks intentional • Use a tight color palette: Let the flag carry the red/white/blue, then keep everything else neutral (black planters, natural doormat, greenery). • Repeat one element: If your flag has stars, add a small star accent on a door hanger or a ribbon on a wreath—just one repeat is enough. • Keep it seasonal, not cluttered: One flag + one porch pot arrangement can look better than multiple small yard signs competing for attention. Choosing the right garden flag stand (and why height matters) Even the best flag can look "off" if it's drooping, too low to read, or placed where it constantly tangles. A dedicated garden flag stand keeps the display crisp and makes swaps quick. The Short Garden Flag Stand is a sturdy metal option sized at 18"w x 38"h, designed to hold a standard small flag (like 12" x 18" or similar). At $22.50, it's the kind of base you can reuse season after season—spring, summer, and straight into fall. Placement tips for real-life homes • Face the walkway: Place the stand where guests naturally approach so the design reads head-on. • Watch sprinkler paths: Occasional moisture is fine for outdoor-rated flags, but constant spray can shorten the life of any fabric. • Give it contrast: Flags show best against mulch, stone, or greenery—not busy flower beds with lots of competing colors. How to plan a simple flag "rotation" from spring florals to July 4th If you like your home to feel seasonally updated but don't want extra work, plan three stops: late spring, everyday summer, and patriotic week(s). You'll get a cohesive look without storing a closet full of decor. 1) Late May–mid June: Choose a floral or garden-themed spring design (birds, geraniums, bouquets). 2) Mid June–late July: Swap to sunflowers, cheerful sayings, or bold summer patterns. 3) Late June–mid July (overlap): Add a Fourth of July option for the holiday window, then return to your everyday summer flag afterward. Care, cleaning, and storage: keep your seasonal garden flags looking new Most fading and wear comes from leaving a flag out through extreme sun and storms without a break. With a little routine care, your seasonal garden flags can stay vibrant across multiple years. • Rotate during harsh weather: If a heavy storm is coming, take the flag down and pop it back up after—especially if your stand is in an exposed area. • Spot clean as needed: Dust, pollen, and splashes happen. Gentle spot cleaning keeps colors bright and prevents grime from setting in. • Store flat or loosely folded: Once the season passes, let the flag fully dry, then store it in a labeled bin or pouch to avoid creases and moisture. • Keep stands indoors in the off-season: A metal stand lasts longer if it's not sitting in wet soil year-round. One more pro tip: carry the look into the next season If you enjoy swapping flags, it's helpful to know that many quality brands keep the same "feel" across the year: similar sizing, double-sided readability, and outdoor-rated fabrics. That makes the transition into autumn seamless when you're ready. For example, the Fall Small Garden Flag (11-Styles) options use BreezeArt® premium SolarSilk® 600 denier polyester in a 12" x 18" format and are also printed in the USA—so your stand and display method can stay the same while the artwork changes. With a small rotation of florals, bright summer motifs, and a well-chosen patriotic design, you can keep your porch and garden feeling current from spring's last blooms all the way through the fireworks—without reinventing your whole outdoor setup each time.
Learn more
Hydrangea Color Guide: Decorating with White, Blue, and Pink Silk Hydrangeas
Why hydrangea color matters in home decor Hydrangeas are one of those rare flowers that can read classic, coastal, romantic, modern, or holiday-ready—depending almost entirely on color. When you’re decorating with hydrangeas, the shade you choose influences everything: how bright the room feels, whether your arrangement looks airy or dramatic, and even how “fresh-picked” your florals read from across the room. That’s why a hydrangea color guide is so useful—especially when you’re investing in silk hydrangeas or faux hydrangeas you’ll reuse again and again. With high-quality artificial hydrangeas, you can build a collection in the core colors (white, blue, and pink) and swap them seasonally without worrying about wilting, shedding, or water damage on furniture. This guide breaks down how to choose between white hydrangeas, blue hydrangeas, and pink hydrangeas, what each color communicates in a space, and practical ways to style them so your silk hydrangeas that look real truly do. What makes silk hydrangeas look real (and why color is part of it) Realism isn’t just about having a pretty bloom shape. The most believable hydrangea decor usually combines a few details that mimic what you’d see in a freshly cut stem: Petal variation: Real hydrangeas have subtle shifts—slightly deeper color in the center, paler edges, and occasional freckles or veining. Soft sheen (not shine): Overly glossy petals can look plastic. A soft, velvety finish reads more natural. Natural stems and branching: A realistic stem has color variation and a little irregularity, not a single flat green. Scale: Hydrangea heads are generous. A bloom that’s too small can look like a “craft flower” rather than a true hydrangea. Color temperature: The undertone matters. A cool white differs from a creamy white; a true blue differs from periwinkle or dusty blue. If you’re shopping for artificial hydrangeas to use as “anchor florals” in arrangements, consider keeping at least one neutral (white) plus one color you love (blue or pink). This gives you flexibility across seasons and room styles. White hydrangeas: the most versatile choice White hydrangeas are the ultimate styling tool. They brighten darker corners, soften bold patterns, and blend into nearly any palette without competing. In many homes, white florals function like a neutral pillow or a great rug: they make everything around them look more pulled together. What white hydrangeas communicate Clean and classic: Crisp white reads as timeless—perfect for traditional spaces and modern minimal rooms alike. Airy and elevated: White hydrangeas naturally create a “full arrangement” look with minimal stems. Event-ready: White hydrangeas feel bridal and special, even in everyday styling. Where white silk hydrangeas work best Entry tables and consoles: White makes a strong first impression without overwhelming the space. Kitchens: Especially pretty against warm wood, marble, or white cabinets—fresh and uncluttered. Bathrooms: White hydrangeas mimic the calm of spa decor and handle humidity better than fresh blooms. Fireplace mantels: Great for layering with greenery, candles, and seasonal accents. How to style white hydrangeas so they don’t feel flat Because white is subtle, the goal is to create dimension through texture and shape. Mix whites with greens: Add eucalyptus, soft ferns, or olive stems for contrast. Use a vase with character: White hydrangeas look high-end in textured ceramic, woven, stoneware, or aged metal. Choose multiple bloom sizes: Layering different hydrangea head sizes keeps arrangements from looking “one-note.” Add a touch of warmth: If your room feels cool, add cream-toned accents or a warm neutral bow/ribbon (if your style leans that way). White hydrangea product picks If you want a premium base floral that’s easy to style, look for realistic petals and a natural stem feel: Natural Touch Garden Hydrangea (6 Colors) for a lush, realistic bloom that styles beautifully in everyday arrangements. Natural Touch Grand Hydrangea (2 Colors) when you want a larger statement head—especially impactful in taller vases. Natural Touch 14" Hydrangea Spray (4 Colors) for tighter spaces, low bowls, or adding volume without a tall stem. Blue hydrangeas: coastal calm and confident color Blue hydrangeas bring instant mood. Depending on the shade of blue and what you pair it with, they can feel coastal and relaxed, tailored and traditional, or even dramatic. If white is the universal neutral, blue is the color that looks intentional—like you designed the room around it. What blue hydrangeas communicate Calm and refined: Blue is naturally soothing, which is why it’s so popular in bedrooms and living spaces. Coastal and airy: Paired with white and natural textures, blue leans beach house without feeling themed. Classic contrast: Blue looks crisp against white trim, light walls, and warm wood floors. Best color pairings for blue hydrangeas Blue + white: Clean and high-contrast; great for kitchens, sunrooms, and traditional dining spaces. Blue + soft green: Natural and organic; perfect for everyday arrangements. Blue + blush: Unexpected and lovely; ideal for spring and summer vignettes. Blue + gold/brass: Looks more elevated and “designed,” especially in formal areas. Where blue silk hydrangeas shine Living rooms: Blue hydrangeas look great next to neutral upholstery; cream, oatmeal, gray, or leather. Dining tables: A blue centerpiece adds color without blocking sightlines if you keep the height moderate. Bedrooms: Blue reads restful; style on a dresser or nightstand with a simple vase. Summer porches (covered): Faux hydrangeas give you that seasonal freshness without heat stress. How to make blue hydrangeas look natural (not overly saturated) Blue can sometimes appear “too perfect” if the shade is intense and uniform. The most realistic look usually comes from gentle variation and thoughtful pairing. Blend tones: Mix two blue shades or add a few white hydrangea heads to break up solid color. Ground with greenery: Green stems add realism and keep blue from feeling like a single block of color. Choose the right vase: Clear glass emphasizes freshness; white ceramic feels clean; natural woven textures feel coastal. Blue hydrangea product picks Natural Touch Garden Hydrangea (6 Colors) if you want a realistic “fresh-cut” look with a soft hand-feel. Rounded Petal Hydrangea (3 Colors) for a fuller, rounded silhouette that works well in classic arrangements. Mini Soft Touch Hydrangea (3-Colors) for bud vases, small shelves, and subtle pops of blue. Pink hydrangeas: warm, welcoming, and surprisingly grown-up Pink hydrangeas are often associated with spring, but they’re far more flexible than many people expect. Depending on the shade, pink can feel soft and romantic, fresh and cheerful, or warm and sophisticated. If your home leans neutral, pink is an easy way to add color without going bold. What pink hydrangeas communicate Warmth and hospitality: Pink feels inviting—excellent for entryways and gathering spaces. Romance without fuss: Hydrangea petals naturally soften the look, so pink doesn’t have to feel “too sweet.” Seasonal joy: Pink transitions beautifully from spring into summer and even into early fall when paired with deeper tones. Best color pairings for pink hydrangeas Pink + white: Fresh, clean, and classic. Pink + green: Garden-inspired and natural. Pink + navy: A more tailored, modern contrast. Pink + rust/caramel: Great for late summer and early fall styling. Where pink silk hydrangeas work best Powder rooms and guest baths: Pink adds charm without needing extra decor. Home office: A small pink arrangement can warm up a work space and still feel polished. Bedroom styling: Pink hydrangeas are lovely on dressers, nightstands, and vanity trays. Spring entertaining: Perfect for brunch tables, buffet styling, and hostess gifts (pair with a vase). How to keep pink hydrangeas from feeling overly “pastel” Add structure: Use a tailored vase shape (cylinder, square, or classic urn) rather than something overly frilly. Mix in neutrals: White and cream blooms balance pink for a more grown-up look. Use deeper greenery: Darker greens help pink look richer and more intentional. Pink hydrangea product picks Natural Touch Garden Hydrangea (6 Colors) for a realistic bloom that looks right at home in everyday arrangements. Natural Touch 14" Hydrangea Spray (4 Colors) for compact styling—especially in low bowls or short vases. Mini Soft Touch Hydrangea (3-Colors) when you want subtle pink touches across a room (shelves, bedside, coffee bar). How to choose between white, blue, and pink hydrangea colors If you’re deciding which color to buy first, think in terms of your home’s fixed elements (floors, countertops, large furniture) and the vibe you want the arrangement to create. Choose white hydrangeas if you want maximum versatility, you decorate seasonally, or you want one arrangement that works almost anywhere. Choose blue hydrangeas if your home leans coastal, classic, or cool-toned—and you want a confident color statement that still feels calm. Choose pink hydrangeas if your home feels neutral or a bit stark and you want to add warmth, softness, and welcoming color. Many decorators find the best “starter set” is mostly white with a few colored stems. That way you can change the look by swapping just one or two blooms rather than rebuilding an entire arrangement. Room-by-room hydrangea decor ideas Entryway: a high-impact, low-effort arrangement For an entry console, you want something full enough to feel styled, but not so tall it blocks sightlines. White hydrangeas are the safe choice; blue or pink add personality. Classic entry look: White hydrangeas + mixed greenery in a textured ceramic vase. Coastal entry look: Blue hydrangeas + white accents in a clear glass vase. Warm entry look: Pink hydrangeas + deeper green leaves in a neutral stoneware vase. Kitchen: keep it simple and fresh Kitchens do best with arrangements that feel clean and unfussy. A small cluster of silk hydrangeas in a compact vase can make the whole space feel finished. White hydrangeas for a crisp, bright look. Blue hydrangeas if you want color that still feels “clean.” Pink hydrangeas if your kitchen is heavy on white and you want warmth. Living room: scale and texture are everything Hydrangeas are naturally generous, which makes them perfect for coffee tables and side tables. Use them to echo accent colors in pillows, art, or rugs. Neutral living room: White hydrangeas as the main bloom; add one or two blue stems for depth. Traditional living room: Blue hydrangeas in an urn-style vase with a few white stems for contrast. Soft modern living room: Pink hydrangeas paired with minimal greenery in a simple vase shape. Bedroom: soft color, soft shape Bedrooms look best with arrangements that feel restful. Hydrangeas naturally create that “cloud” effect, which reads calm and romantic without trying too hard. White hydrangeas for spa-like serenity. Blue hydrangeas for cool, quiet elegance. Pink hydrangeas for warmth and comfort, especially in guest rooms. Bathroom: humidity-friendly beauty Fresh hydrangeas don’t always love bathroom conditions, but artificial hydrangeas handle it well. Keep the styling tight: one or two stems in a bud vase or a short arrangement on a tray. Seasonal styling: making one hydrangea collection work year-round One of the biggest advantages of faux hydrangeas is how easily they transition through seasons. If you build your base in white, then add blue and pink as accent colors, you can update your look with minimal effort. Spring Pink hydrangeas with light greenery for a fresh, garden feel. White hydrangeas with soft trailing greens for a clean spring reset. Summer Blue hydrangeas with white for a coastal, breezy palette. Pink hydrangeas with brighter greens for cheerful summer color. Fall (early fall styling) White hydrangeas paired with deeper greens and warmer textures (wood, woven, brass). Pink hydrangeas paired with caramel/rust accents for a late-summer-to-fall transition. Winter White hydrangeas with evergreen stems for a crisp winter look. For a snow-kissed effect, try a wintry bundle like Snowy Hydrangea Bundle in seasonal arrangements. Design formulas that always work (even if you’re not “good at arranging”) If floral arranging feels intimidating, use a simple formula. Hydrangeas make this easier because they naturally create volume. Formula 1: The “all-hydrangea” statement Use only hydrangeas in one color (white, blue, or pink) for a clean, high-end look. Best for: dining tables, consoles, kitchen islands Tip: vary the angles of the stems so the heads don’t sit in a perfect line Formula 2: Hydrangeas + greenery (the most realistic) Hydrangeas as the main bloom, greenery as support and movement. Best for: everyday styling in living rooms and entryways Tip: let greenery extend slightly beyond the hydrangeas for a natural shape Formula 3: Hydrangeas + one accent flower Keep hydrangeas dominant and add one secondary flower type for texture. Best for: spring/summer tables and layered vignettes Tip: choose an accent flower that contrasts in shape (something airy or spiky) Buying guide: choosing the right type of artificial hydrangea Not all silk hydrangeas are made the same. When you’re shopping, consider how and where you’ll use them. Single stems vs. sprays vs. bundles Single stem hydrangeas: Best for statement vases and clean, simple arrangements. Try Natural Touch Garden Hydrangea or Natural Touch Grand Hydrangea when you want that focal bloom. Hydrangea sprays: Great for adding volume in lower arrangements, tucking into wreath work, or filling gaps. Consider Natural Touch 14" Hydrangea Spray. Bundles: Helpful for fast seasonal styling and fuller looks right away, especially winter looks like Snowy Hydrangea Bundle. Petal shape: rounded vs. more natural variation If you like a classic, full silhouette, a rounded petal style can look beautifully traditional. If you want a more fresh-from-the-garden feel, choose hydrangeas with subtle petal variation and nuanced color. For a rounded, full bloom look, consider Rounded Petal Hydrangea. Scale: match bloom size to vase size Large vase, large blooms: Bigger hydrangea heads prevent the “tiny flower in a big vase” issue. Small vase, smaller blooms: Use mini hydrangeas or shorter sprays so the arrangement looks proportional, like Mini Soft Touch Hydrangea. Care tips: keeping silk hydrangeas beautiful High-quality silk hydrangeas that look real will stay that way longer with a little maintenance. Dust regularly: A quick, gentle pass keeps petals from dulling. (Dust is what makes faux florals look “fake” fastest.) Avoid direct sunlight: Like fabric, petals can fade over time in strong sun. Rotate arrangements if they sit in bright windows. Store with shape in mind: Don’t crush blooms in a tight bin. Give heads room, or wrap loosely to protect petals. Fluff and reshape: Before styling, gently separate petals and angle stems for a natural, organic silhouette. Quick recommendations: which hydrangea color should you buy? If you want the simplest decision: Start with white hydrangeas for the most flexible, year-round hydrangea decor. Add blue hydrangeas if you love calm color and classic contrast (especially in summer). Add pink hydrangeas if your home needs warmth and softness without going bold. With a small collection in these three hydrangea colors, you can build arrangements that feel custom, seasonal, and polished—without the upkeep of fresh blooms. If you’re ready to compare realistic options, you can explore staples like Natural Touch Garden Hydrangea and Natural Touch 14" Hydrangea Spray to create your own mix in white, blue, and pink.
Learn more
Centerpiece Ideas Using Silk Hydrangea Stems for Dining Tables and Buffets
Silk hydrangeas are one of the most reliable “always works” flowers for styling a home. The blooms are full enough to read as a statement from across the room, yet soft enough to blend with almost any decor style. Whether you’re hosting a dinner party, setting up a buffet table decor moment, or planning wedding centerpieces that need to look fresh from start to finish, hydrangea stems for centerpieces give you the impact of fresh flowers without the timing stress. Below you’ll find practical hydrangea centerpieces and dining table centerpiece ideas that lean into what silk does best: consistent color, lasting shape, and the ability to build layered centerpieces with candles and greenery. You can keep these arrangements low for conversation, or scale them up for a buffet where height and volume look intentional. Why silk hydrangea stems work so well for centerpieces Hydrangeas have a naturally “finished” look—one bloom can fill a vase, while a few stems can create a lush arrangement quickly. With quality silk, you can also control the silhouette in a way fresh flowers rarely allow. If you’re deciding whether silk hydrangea arrangements are right for your table, here’s what experienced stylists tend to love about them: Instant fullness: Hydrangeas read as abundant even in smaller vases, which is ideal for compact dining tables. Better predictability: No last-minute drooping or browning—especially helpful for dinner party centerpieces and wedding centerpieces. Easy color coordination: Choose tones that match your linens, china, and seasonal decor without worrying about availability. Reusable styling: Rotate the same stems from dining room to entry to buffet, swapping only the vessel or candles. If you’re building your collection, start with a few high-quality stems in your go-to neutral and one accent color. A natural-touch finish can help the blooms look more true-to-life on a tabletop where guests see them up close, like the Natural Touch Garden Hydrangea (6 Colors) or the more compact Natural Touch 14" Hydrangea Spray (4 Colors). Choosing the right size: dining table vs. buffet For dining tables: prioritize width and a low profile On a dining table, guests need to see each other and pass serving dishes comfortably. A good rule is to keep most blooms under eye level when seated. Hydrangeas are naturally wide, so you can go low and still look generous. Best vessels: low bowls, compotes, short cylinders, or even grouped bud vases for a scattered look. Best stem choice: shorter sprays or stems trimmed down to sit compactly. Best add-ons: a table centerpiece with candles to add glow without adding height. For buffets and sideboards: height can be your friend Buffets are where you can create a focal point. Taller hydrangea centerpieces draw the eye upward and make the serving area feel styled rather than purely functional. Best vessels: taller vases, urns, or handled pitchers for an elegant, casual feel. Best stem choice: longer stems or a mix of long and short for a layered centerpiece that looks intentional. Best add-ons: greenery garlands, candle clusters, or small accents spaced along the length of the buffet. Core ingredients for silk hydrangea arrangements that look realistic When silk arrangements look “off,” it’s usually because they’re missing one of three things: variation, movement, or believable mechanics. Here’s a simple formula that works for dining tables and buffets alike. Variation in scale: Use at least two sizes of bloom or combine a large hydrangea stem with smaller sprays. Movement from greenery: Add something airy or trailing so the arrangement doesn’t look like a ball. Great options include Springeri Fern Spray for softness, Muehlenbeckla Greenery Bush for a delicate, vine-like look, or Natural Touch Triple Salal Leaf for a more structured, classic base. Believable mechanics: Use floral foam or a pin frog in bowls, and conceal it with greenery. In clear glass, keep stems neat and intentionally placed. Think of hydrangea as the “mass,” greenery as the “line,” and candles as the “light.” When you include all three, layered centerpieces become easier and more polished. 7 centerpiece ideas with silk hydrangea stems (dining table and buffet friendly) 1) The low-and-lush hydrangea bowl (best for conversation) This is one of the most adaptable dining table centerpiece ideas because it’s generous without being tall. It works for everyday dining, holiday meals, and casual entertaining. What you need: a low bowl or compote, 3–6 hydrangea stems for centerpieces, and a handful of greenery. How to build it: create a base of salal leaf or fern to cover mechanics, then place hydrangeas in a loose dome. Let a few greenery pieces extend outward to soften the rim. Styling tip: keep the top slightly uneven; perfectly round can look artificial. If your table is narrow, use fewer stems and add more greenery for width without bulk. 2) Table centerpiece with candles and hydrangea “mini moments” For a dining table centerpiece that feels elevated but still practical, pair candles with small hydrangea groupings rather than one large arrangement. This creates rhythm down the table and feels especially inviting at night. What you need: 3–5 glass hurricanes or holders and 3–6 short hydrangea sprays. Great foundation pieces: cluster Glass Candle Holder (3 Sizes) in mixed heights for a layered centerpiece effect. How to build it: place your candles first, then tuck small hydrangea bundles between them. Use a little fern or muehlenbeckia to connect the groupings. For extra polish, keep candle heights staggered (short, medium, tall) and repeat your hydrangea color in at least three spots so it feels cohesive. 3) The candle ring centerpiece (fast, tidy, and reusable) If you like the glow of candles but want a cleaner, contained look, a candle ring is a shortcut to a finished centerpiece. This is also a smart option for hosts who want to style quickly before guests arrive. What you need: one statement candle holder or hurricane, a candle ring, and 1–3 hydrangea stems. Try this: the 18" Natural Ruscus Candle Ring as your greenery base. How to build it: set the candle holder in the center, then nestle trimmed hydrangea blooms into the ring so they look like they’re growing out of the greenery. This centerpiece with greenery is especially effective for rectangular dining tables, because it reads as long and intentional without needing a full garland. 4) The “runner without a runner” buffet centerpiece Buffet table decor often needs to do two things: create a focal point and still leave room for serving pieces. Instead of covering the whole surface, create a visual runner using repeated groupings. What you need: one taller hydrangea arrangement for the center, plus two smaller pieces (candles or mini vases) to flank it. How to build it: place your tallest arrangement in the middle, then mirror smaller elements on each side. Add a few sprigs of muehlenbeckia or fern to link the pieces. Styling tip: vary textures. Pair full hydrangea blooms with finer greenery so the display doesn’t feel heavy. This approach gives you the “layered centerpieces” look while keeping the buffet usable. 5) The taper-and-hydrangea centerpiece (classic, wedding-ready) If you love a more traditional, formal look, taper candles plus hydrangeas are a timeless combination. This works beautifully for wedding centerpieces, bridal showers, and anniversary dinners. What you need: 3 taper candle holders, 3 tapers, and 3–5 hydrangea stems or sprays plus greenery. Try this: the Set of 3 Golden Taper Candle Holders for height and warmth. How to build it: place taper holders in a loose triangle or line, then create low hydrangea clusters around the bases. Add salal for a polished, classic leaf shape. To keep it dining-friendly, avoid placing tall tapers directly in the center of a small round table; shift them slightly off-center and keep hydrangeas low in the middle. 6) The mixed-vase hydrangea collection (designer look, flexible layout) Using several smaller vases instead of one centerpiece is one of the most useful dinner party centerpieces tricks—especially if you need to clear space for platters or want to spread decor across a long table. What you need: 5–9 small vases (clear or ceramic), hydrangea sprays, and a few stems of airy greenery. How to build it: place one hydrangea bloom per vase in alternating heights, then add greenery sparingly to a few vases for movement. Why it works: you can remove a vase or two during serving without the table looking bare. This is also a great approach for smaller budgets: a handful of hydrangea stems for centerpieces can go farther when split among vases. 7) The statement buffet urn (high impact with minimal components) For a buffet, entry, or sideboard where you want a single “wow” piece, go for a taller vessel and a confident silhouette. Hydrangeas naturally create volume, and greenery gives you the cascading shape that looks high-end. What you need: a tall vase or urn, 5–9 hydrangea stems (depending on bloom size), and trailing greenery. How to build it: start with greenery to establish height and direction, then place hydrangeas in layers—some high, some mid, a few slightly forward. Finish by pulling one or two greenery pieces down the front edge. Styling tip: turn the arrangement as you build. You want a 360-degree look if it will be seen from multiple angles. How to build layered centerpieces that don’t feel cluttered Layered centerpieces are popular because they feel collected and expensive, but they can go wrong if every piece competes for attention. Use this simple structure to keep it clean: One hero element: a main hydrangea arrangement or a trio of candle holders. One supporting element: greenery that connects (fern, salal, muehlenbeckia). One accent: a smaller candle, a second hydrangea color, or a different bloom size. Then edit. If your display feels busy, remove the smallest items first. In most cases, fewer pieces with more intention will look more upscale. Color pairing ideas for silk hydrangea arrangements Hydrangeas can swing traditional, coastal, modern, or romantic depending on color and vessel choice. Here are proven combinations for hydrangea centerpieces on dining tables and buffets: White hydrangea + deep greenery: crisp, timeless, and ideal for weddings and formal dinners. Soft blue + airy fern: relaxed and coastal; looks beautiful in clear glass. Blush + salal leaf: romantic and great for bridal showers and spring entertaining. Green hydrangea + mixed greenery: fresh and modern; reads like a “garden” arrangement. Moody tones + gold candlelight: elegant for fall and winter dinners, especially with taper holders. If you’re nervous about committing to a strong color, use neutral hydrangeas for the main arrangement and bring color in through candles, linens, or smaller accent vases. Practical proportions: how many hydrangea stems do you need? Stem count depends on bloom size, vessel shape, and how much greenery you’re using. As a general guide for hydrangea stems for centerpieces: Small vase (4–6" opening): 1–2 hydrangea blooms + a few greenery sprigs. Medium centerpiece bowl: 3–6 blooms, depending on how tight you pack them. Large vase/urn for buffet: 5–10 blooms plus a fuller greenery base for scale. To avoid an overly dense look, build greenery first and let it occupy space. Then add hydrangeas until it feels balanced rather than stuffed. Hydrangea centerpieces for specific occasions Wedding centerpieces that last all day Silk hydrangea arrangements are especially useful when you need consistency from ceremony through reception. For wedding centerpieces, focus on repeatable designs that can be assembled in multiples: Low-and-lush bowls: ideal for guest tables and easy for conversation. Taper-and-hydrangea clusters: perfect for head tables and sweetheart tables when you want candlelight. Mixed-vase collections: adaptable if you have different table sizes. Choose one hydrangea color as your anchor and repeat the same greenery across designs for a cohesive look in photos. Dinner party centerpieces that don’t interfere with serving For hosting, the best centerpieces are the ones you don’t have to apologize for. Keep these priorities in mind: Stay low: keep blooms below eye level and use wider shapes. Use candlelight strategically: a table centerpiece with candles adds ambiance without taking up serving space. Make it movable: mixed-vase setups let you shift pieces as dishes arrive. Buffet table decor that frames the food A buffet should feel styled, but the food is still the star. Use hydrangeas to frame, not crowd: One tall arrangement: anchor the center or one end. One low element: candle cluster or small hydrangea bowl near the opposite end for balance. Open space in the middle: leave room for platters and serving utensils. This “anchor + balance + breathing room” formula makes buffet styling look intentional every time. Finishing touches that make silk look elevated The difference between “nice” and “wow” is usually in the finishing details. These small steps help hydrangea centerpieces look realistic and retail-styled: Fluff every bloom: gently separate petals and rotate the bloom so it faces the room, not just straight up. Bend stems naturally: create subtle angles. Perfectly upright stems can look stiff. Add negative space: leave a few small gaps so the arrangement has depth. Repeat materials: if you use gold taper holders, echo that warmth with a gold-rimmed tray or brass accents nearby. Mind the shine: if a leaf looks overly glossy, position it slightly under a bloom or mix it with a more matte greenery. Easy shopping list: build a hydrangea centerpiece “kit” you can reuse If you like to change your look seasonally but want a reliable base, keep a small set of staples on hand and swap colors as needed. A reusable kit might include: Hydrangea stems in 1–2 core colors: for example, a natural white/cream plus a seasonal accent. Consider starting with Natural Touch Garden Hydrangea (6 Colors) for fuller designs and adding Natural Touch 14" Hydrangea Spray (4 Colors) for smaller vases and filler moments. Two greenery types: one structured (like Natural Touch Triple Salal Leaf) and one airy (like Springeri Fern Spray or Muehlenbeckla Greenery Bush). Candle components: a trio of holders, plus hurricanes for flexibility. The Glass Candle Holder (3 Sizes) makes it easy to vary height, while the Set of 3 Golden Taper Candle Holders brings in a formal, warm note. A greenery ring: the 18" Natural Ruscus Candle Ring is a quick way to create a centerpiece with greenery around a candle. With these basics, you can create everything from intimate dinner party centerpieces to buffet table decor displays and wedding centerpieces, simply by changing the vessel, candle color, or hydrangea shade. Final thoughts: choosing the best hydrangea centerpiece style for your space If you want a centerpiece that works for everyday and entertaining, start with a low hydrangea bowl or a candle-and-mini-moments layout. If your goal is impact for a buffet or a special event, go taller with a statement arrangement and add greenery for movement. In all cases, hydrangeas do the heavy lifting—candles add atmosphere, and greenery creates that designer, layered centerpiece finish. When you’re ready to refresh your table, focus on pieces you’ll use again and again: quality hydrangea stems for centerpieces, a couple of reliable greenery options, and candle holders that layer well. That combination gives you endless variations without reinventing your decor every time you host.
Learn more
Silk Hydrangeas for Weddings: Bouquets, Table Decor, and Keepsakes
Hydrangeas have a way of making a wedding feel instantly full, romantic, and thoughtfully styled. Their rounded blooms photograph beautifully, soften tablescapes, and add an airy luxury to bouquets. The challenge, of course, is that real hydrangeas can be sensitive to heat, timing, and hydration. That’s exactly why more couples (and planners) are choosing silk hydrangeas for weddings to get the look they love with far fewer day-of worries. This guide covers how to use silk wedding flowers, especially hydrangeas, in bridal bouquets, wedding hydrangea centerpieces, ceremony arrangements, and lasting keepsakes. You’ll also find practical tips for selecting high-quality faux stems, matching colors, building volume, and keeping everything photo-ready. Why hydrangeas are a wedding favorite (and why silk makes sense) Hydrangeas read as “wedding” for good reason: they’re lush without being fussy, classic without feeling dated, and they work with nearly any aesthetic, garden, coastal, classic, modern, rustic, and winter white. Their large bloom heads create instant impact, which can reduce the number of stems you need across bouquets and wedding table flowers. Still, fresh hydrangeas are notorious for wilting if they’re not conditioned properly or if they sit out in heat. When you choose faux wedding flowers, you gain consistency. Bouquets can be built weeks ahead, centerpieces can be transported without stress, and your hydrangeas won’t droop halfway through photos. Couples often choose artificial hydrangeas for one of three reasons: Reliability: Your flowers look the same at the first look as they do at the last dance. Budget clarity: You can plan quantities and costs upfront, and reuse pieces between ceremony and reception. Longevity: A keepsake bouquet is built in—you can display it at home without preservation fees. What to look for in silk hydrangeas that photograph like the real thing Not all artificial hydrangeas are created equal. The difference between “pretty from a distance” and “convincing up close” comes down to texture, color variation, stem structure, and finish. 1) Petal texture and “natural touch” feel Hydrangea petals should have a soft, slightly thickened feel (not paper-thin). If you’re choosing pieces that will be held close to the camera, like an artificial wedding bouquet, prioritize stems described as “natural touch” or with realistic petal coating. A great starting point is Natural Touch Garden Hydrangea (6 Colors), which is designed to look and feel more lifelike for bridal work. 2) Color variation (the detail that makes them believable) Real hydrangeas rarely read as a single flat tone. Look for subtle shading along petal edges, gentle ombré, or a mix of tiny color flecks that mimic nature. This is especially important for whites and blushes, which can look too stark if they’re one solid shade. 3) Stem flexibility and scale Hydrangea heads should feel full and correctly proportioned to the stem. For smaller accents—boutonnieres, bud vases, and cake table arrangements—use a smaller spray style such as Natural Touch 14" Hydrangea Spray (4 Colors) to keep everything in scale. 4) A finish that doesn’t look shiny in photos Overly glossy petals can reflect flash and look artificial. If you’re shopping in person, view stems under bright overhead lights and natural light near a window. If you’re shopping online, choose lines that are photographed close-up and are made specifically for realistic floral design. Designing a silk bridal bouquet with hydrangeas A silk bridal bouquet built with hydrangeas can be classic and round, airy and garden-inspired, or modern and minimal. Hydrangeas are naturally voluminous, so they do the heavy lifting. Your job is to add shape, movement, and a few supporting textures so the bouquet doesn’t look like a single “ball” of blooms. Best bouquet styles for hydrangea bridal flowers Round and timeless: Hydrangeas as the main mass with roses or peonies tucked in for focal points. Garden gathered: Hydrangeas mixed with airy filler and soft greenery for movement. Modern minimal: Mostly hydrangeas with clean greenery and a crisp wrap. Cascade (subtle): Hydrangeas at the top with trailing greenery and a few downward accents. How many hydrangea stems do you need for a bridal bouquet? It depends on bloom size and the silhouette you want, but as a general planning range: Medium bouquet: 3–5 hydrangea heads plus accent blooms/greenery Full, lush bouquet: 5–8 hydrangea heads plus accents Hydrangea-forward statement: 8–12 hydrangea heads with minimal extras If you want a naturally scaled bouquet (not oversized), start smaller and build. Hydrangeas expand visually fast, especially in photos. Easy recipe: a soft garden silk bridal bouquet This is a reliable formula that works across seasons and color palettes: Main blooms: 4–6 hydrangea heads (choose one main color, plus one subtle shade for depth) Airy filler: 3–5 stems of Baby's Breath Spray to break up the mass Greenery: 3–6 stems of Pittosporum Stem for a light, natural outline Optional modern accent: 1–2 stems of Echeveria Stem (2 Colors) for a subtle contemporary touch This combination keeps hydrangeas front and center while adding the fine texture and gentle movement that makes a bouquet look fresh-picked instead of manufactured. How to finish a silk wedding bouquet so it feels professional Vary the heights: Keep some hydrangea blooms slightly higher and some tucked lower so the bouquet has dimension. Turn the bouquet as you build: Rotate in your hands to ensure the front looks good from multiple angles. Create a clean handle: Remove bulky leaves near the grip area and wrap stems neatly. Test in a mirror and with your phone camera: Photos reveal gaps and flat spots quickly. Bridesmaids, boutonnieres, and ceremony flowers with silk hydrangeas Once you choose hydrangeas for the bridal bouquet, it’s easy to carry that theme through the wedding party and ceremony for a cohesive look. Bridesmaid bouquets Bridesmaids’ bouquets should support the bride rather than compete. A simple approach is 2–4 hydrangea heads per bouquet with airy filler and a touch of greenery. If the bridal bouquet is mixed-color, consider giving bridesmaids a single hydrangea shade for clean visual order in photos. Boutonnieres and corsages Hydrangea petals are small enough to work nicely in boutonnieres when used sparingly. Use a small cluster from a spray-style stem, then add a tiny greenery piece and one small accent (like baby’s breath). For durable wear: Keep the boutonniere lightweight. Avoid oversized hydrangea chunks that can flop forward. Secure the mechanics well so the piece doesn’t twist on fabric. Ceremony arrangements you can reuse One of the biggest practical benefits of silk wedding flowers is repurposing. Ceremony pieces can become sweetheart table decor, cake table styling, or bar arrangements at the reception. If you want ready-to-style options that can be moved easily, consider pre-designed pieces like Custom Wildflower Snowball Arrangement for a floral-forward statement, or Custom Bloom & Breeze Table Arrangement for reception tables that need a polished, cohesive look without building everything from scratch. Wedding hydrangea centerpieces: table decor that looks lush all night Hydrangeas were made for centerpieces. Their rounded shape reads full and abundant even in a simple vase, and they’re versatile enough for everything from formal ballroom tables to backyard receptions. Centerpiece formats that work especially well with hydrangeas Low and lush: Perfect for conversation-friendly tables. Hydrangeas create a full mound without needing height. Compote or pedestal bowl: Elevates the design and adds a classic wedding feel. Bud vase collections: Use small hydrangea sprays mixed with baby’s breath and greenery for a light, modern look. Garland runner with “moments”: Add clusters of hydrangeas along greenery for a styled-but-not-stuffy feel. How many stems per table? Here’s a practical planning guide for wedding hydrangea centerpieces on standard 60" round tables: Low centerpiece (single arrangement): 3–6 hydrangea heads plus filler and greenery Compote centerpiece (full and formal): 6–10 hydrangea heads plus accents Bud vase set (6–10 vases): 1 small spray or partial head per vase, mixed with airy filler For long banquet tables, plan in repeating groupings (for example, one larger hydrangea moment every 18–24 inches, with greenery and candles in between). Seasonal styling ideas for wedding table flowers Hydrangeas adapt beautifully across seasons. Use your palette and supporting textures to tell the story. Spring: Soft whites, blush, light blue, and fresh greens. Add baby’s breath for lightness. Summer: Blue and white for coastal, or bright mixed tones for a garden party vibe. Fall: Pair hydrangeas with deeper greens and warm neutrals; consider adding dried-look textures for depth. Winter: White-on-white can be stunning. A piece like Snowy Hydrangea Bundle works well for wintry centerpieces and holiday-adjacent weddings. DIY wedding flowers with silk hydrangeas: a realistic plan (and a timeline) If you’re considering DIY wedding flowers, hydrangeas are one of the easiest “high-impact” blooms to work with. You can create fullness quickly, and silk stems are forgiving—no water buckets, no last-minute wilting, no scrambling to replace bruised petals. A low-stress DIY timeline 8–12 weeks out: Finalize palette, decide arrangement styles (bridal bouquet, bridesmaids, centerpieces), order stems, and gather tools. 6–8 weeks out: Build a prototype centerpiece and one prototype bouquet. Adjust quantities before committing. 3–5 weeks out: Assemble bridesmaid bouquets and most centerpieces. Store in boxes or large bins so blooms don’t crush. 1–2 weeks out: Build the bridal bouquet and detail pieces (boutonnieres). Do a photo test. Wedding week: Final fluffing, transport plan, and venue setup. Tools and supplies you’ll actually use Wire cutters (floral stems can be thick) Floral tape and/or stem wrap Ribbon for bouquet handles Zip ties (excellent for securing mechanics in centerpieces) Vases/compotes and optional foam or chicken wire for structure Transport and setup tips (where DIY often goes wrong) Box bouquets upright: Use tall boxes or bins so blooms don’t flatten. Label everything: Table numbers, “sweetheart,” “gift table,” etc. Bring a mini kit: Scissors, extra ribbon, tape, and a few spare stems for quick fixes. Assign a “flower captain”: Someone who isn’t in hair and makeup can handle placement and last-minute fluffing. How to choose colors: making silk hydrangeas look natural in your palette Hydrangeas can be a main color moment or a soft blending bloom. With hydrangea bridal flowers, the key is to avoid a “too perfect” match across everything. Real weddings look best when tones vary slightly. Color strategies that read expensive and intentional Monochrome with variation: Use multiple whites/ivories or multiple blues to create depth. Hydrangeas as a neutral: White or soft green hydrangeas can support bolder accent colors. Two-tone hydrangea mix: Blend one main shade with one lighter shade to mimic natural variation. If you’re coordinating with bridesmaid dresses, remember that camera sensors often shift blues and purples. A quick phone photo test beside fabric swatches can save you from surprises. Silk vs fresh hydrangeas: how they compare for weddings Choosing between fresh and silk doesn’t have to be all-or-nothing. Many couples do a blend: silk for personal flowers and high-stress pieces, fresh for select statement moments, or vice versa. Here’s a practical comparison to help you decide. Look: High-quality silk can photograph extremely well; fresh has unmatched natural variation up close. Durability: Silk wins—especially for heat, sun, and long photo timelines. Planning: Silk allows early assembly and easy repurposing; fresh requires careful timing and conditioning. Cost control: Silk often has higher upfront cost per stem but can be reused and kept; fresh is one-and-done and can fluctuate by season. Keepsake potential: Silk wins by default; fresh requires preservation. From bouquet to keepsake: ways to preserve your wedding flowers beautifully One of the most meaningful reasons to choose silk hydrangeas for weddings is the ability to keep your bouquet exactly as it looked on the day. With silk, your keepsake bouquet isn’t a fragile memory, it’s decor you can enjoy for years. Keepsake ideas couples actually display Shadowbox bouquet: Place a smaller version of your bouquet (or a few signature stems) in a deep frame. Anniversary vase arrangement: Rework your bridal bouquet into a vase you can style seasonally. Memory arrangement: Combine a few wedding stems with flowers from other milestones. Mini bouquet for a parent: Create a smaller arrangement as a thank-you gift. How to store silk wedding flowers after the event Keep them dry and dust-free: Store in a lidded bin or box. Avoid crushing: Support bloom heads with tissue paper. Store away from heat and direct sunlight: Helps prevent fading over time. Shopping smart: building a cohesive silk wedding flower collection When you’re buying silk wedding flowers, it helps to think in “collections” rather than single stems. Choose your hero bloom (hydrangea), then pick 1–2 supporting textures and 1 greenery. This keeps everything consistent across bouquets, wedding table flowers, and ceremony pieces. A simple way to plan your order List every floral moment: bridal bouquet, bridesmaids, boutonnieres, centerpieces, sweetheart table, cake table, ceremony entry, etc. Decide what needs to match perfectly: Usually the bridal bouquet and bridesmaids, plus one centerpiece style. Choose 2–3 hydrangea stem styles/sizes: Larger heads for bouquets and main arrangements, smaller sprays for accents and bud vases. Add consistent supporting stems: Baby’s breath and pittosporum are versatile and photograph well. Order a few extra stems: Spares make last-minute design tweaks easy. Quick styling recipes (bouquets, centerpieces, and more) Use these as starting points and adjust to your palette and venue style. Recipe 1: Classic white silk bridal bouquet 5–7 white hydrangea heads (mix subtle shades if possible) 3–5 stems baby’s breath for softness 3–6 stems pittosporum to frame and add movement This creates a clean, timeless silk bridal bouquet that works with almost any dress silhouette. Recipe 2: Garden-inspired wedding hydrangea centerpieces (low) 4–6 hydrangea heads 2–4 baby’s breath stems 4–8 greenery stems (pittosporum or similar) Build in a shallow bowl or low vase for a conversation-friendly look that stays full all night. Recipe 3: Bud vase table styling (minimal and modern) Small hydrangea sprays (1 per vase or split across vases) Baby’s breath in a few vases for airy variation Greenery sprigs to keep the look cohesive This approach stretches your stems across many tables and creates a light, curated feel. Choosing an artificial wedding bouquet that feels like “you” Your bouquet is one of the most photographed pieces of the day—during the first look, ceremony, portraits, and reception. An artificial wedding bouquet should match your style and hold up to close-ups. When hydrangeas are part of your vision, aim for a design with: Dimension: Not all blooms at the same height. Textural contrast: Hydrangeas plus airy filler (like baby’s breath) plus greenery. A comfortable handle: A bouquet can be heavy; hydrangeas add volume quickly. If you’re torn between DIY and ready-to-go pieces, a smart middle ground is to start with a polished table arrangement or two and then DIY the rest to match. That way, you set a quality benchmark and keep the overall look consistent. Final thoughts: silk hydrangeas that work hard and last long Hydrangeas bring softness, volume, and romance to wedding design—and in silk, they bring peace of mind. Whether you’re planning a full floral install or simply want a reliable keepsake bouquet, high-quality faux wedding flowers let you create a cohesive look across bouquets, wedding hydrangea centerpieces, and personal flowers without the pressure of day-of freshness. If hydrangeas are part of your wedding vision, consider mixing a larger, realistic stem (for bouquets and statement moments) with a smaller spray (for detail work), then tie it all together with consistent filler and greenery. The result is wedding florals that photograph beautifully, travel well, and can be enjoyed long after the last dance.
Learn more
Outdoor Decor Ideas to Refresh Your Porch and Patio for Every Season
Make Your Outdoor Living Space Feel Fresh All Year Long A porch refresh doesn’t have to mean a full makeover every few months. The most inviting outdoor living space is built on a simple formula: a solid base of outdoor furniture, a few “anchor” decor pieces that work in any season, and quick swaps that bring in seasonal outdoor decor without creating clutter (or a big storage problem). Below you’ll find outdoor decor ideas that prioritize comfort, durability, and easy updates, so your patio decorating and porch decorating ideas feel intentional in spring, summer, fall, and winter. This guide leans commercial in the best way: it helps you evaluate what to buy once, what to swap seasonally, and what’s worth upgrading for a porch or patio you actually use. Start With a “Forever Base” That Works in Every Season If your porch or patio never quite looks finished, the issue usually isn’t the decor—it’s the foundation. Before you add seasonal outdoor decor, make sure your basics are doing the heavy lifting: seating, surfaces, and a cohesive color palette. 1) Choose Outdoor Furniture That Fits the Way You Live When shopping for outdoor furniture, it helps to decide what the space is for. Is it coffee in the morning? Family dinners? A spot to read? The right layout makes patio decor look curated because the space functions well. Conversation porch/patio: two chairs + a small table is often enough for a welcoming front porch or compact patio. Lounge setup: chaise seating plus a side table creates a resort feel and encourages use. Dining-forward: if you entertain, prioritize a sturdy outdoor table and comfortable chairs before you buy any accessories. If you want a streamlined, easy-care foundation, consider investing in maintenance free outdoor furniture pieces designed to handle weather and heavy use without constant upkeep. For example, an Outdoor Maintenance Free Table gives you a strong anchor for styling—centerpieces, lanterns, serving trays—while still being practical for everyday meals. To build a cohesive seating area, look for chairs with a classic silhouette that can be styled with different cushions by season. A statement option like the Fan Back Outdoor Chair adds character even before you decorate. 2) Add “Always-On” Surfaces for Styling and Function One of the simplest patio decorating upgrades is adding more small surfaces. A side table makes a space feel finished because it signals comfort: a spot for a drink, a book, a small planter, or a candle. Use a folding side table when space is limited or you like to reconfigure for guests. Mix heights (a coffee-table height plus a taller side table) to make decor arrangements more visually interesting. A compact, flexible option like anOutdoor Folding Side Table works across seasons and makes it easier to style without overcrowding your seating. 3) Pick a Simple, Repeatable Color Recipe Year-round outdoor decor looks best when your base colors stay consistent, and the seasonal accents do the changing. If you’re unsure where to start, choose: One neutral: cream, black, gray, or natural wood tones. One foundation color: navy, forest green, or a warm terracotta. One seasonal accent: you can swap this out quarterly (coral in summer, rust in fall, icy blue in winter, fresh green in spring). This approach makes porch decorating ideas easier to execute because you’re not reinventing your whole space every time the season shifts. Outdoor Decor Ideas That Instantly Make a Porch or Patio Look Styled Once the base is set, a few high-impact elements can transform the feel of the space. These are the pieces that make visitors think, “This is so welcoming,” even if you only spent 20 minutes on the update. 4) Create a Front-Door “Moment” With a Wreath A wreath is one of the easiest ways to signal the season, and it’s especially effective for a porch refresh because it sits at eye level. If you want one wreath to carry you through multiple months, choose greenery and customize the bow for the season. A classic evergreen option like the 24" Salal Leaf Wreath w/ Custom Bow can be styled for spring, summer, and even winter simply by switching ribbon colors or adding subtle seasonal accents. For an unmistakable fall statement, a fuller design like the Custom Fabulous Fall Wreath can carry you from early September through Thanksgiving. 5) Use Flags and Small Signage for Fast Seasonal Swaps If you like seasonal outdoor decor but don’t want bins of accessories, a garden flag is one of the best value swaps you can make. It takes seconds to change and brings color to landscaping or a porch corner without cluttering seating. Try a cheerful option like the Summer Garden Flag (6-Styles) for warm-weather patio decor, then rotate to harvest or holiday themes as the year progresses. 6) Add Motion and Sound With a Wind Chime Great patio decorating isn’t only visual. Subtle sound and motion make an outdoor living space feel relaxing and “alive.” A wind chime near a seating area adds charm without taking up surface space. A nature-inspired piece like the Butterfly Garden Wind Chime works beautifully for spring and summer, and it still feels appropriate in early fall when the weather is mild. 7) Light the Path With Solar Stakes Lighting is one of the most overlooked outdoor decor ideas, but it’s the difference between a porch you only use in daylight and one you actually enjoy at night. Solar accents are especially convenient for seasonal outdoor decor because there are no cords and minimal setup. Something like the 36" Solar Bird Garden Stake (3-Styles) can define a walkway, frame a garden bed, or add a soft glow near seating. Season-by-Season Porch and Patio Decorating Ideas Now for the fun part: styling each season without starting over. Think of this as a capsule wardrobe for your patio decor—your furniture stays consistent, and you rotate a few key pieces for a fresh look. Spring: Fresh, Light, and Welcoming Spring porch decorating ideas should feel airy and clean after winter. Focus on brightening the entry, adding soft color, and keeping textures light. 8) Spring Porch Refresh Checklist Refresh the front door area: swap to a green wreath and a crisp bow, or choose a spring-forward ribbon color. Add a soft color story: sage, pale blue, buttercream, or blush accents. Bring in natural textures: woven planters or baskets (or even a textured outdoor-safe tray on your table). Layer lighting: add solar stakes along the path for longer evenings. Spring is also a smart time to evaluate your outdoor furniture cushions. If they’ve faded or flattened, replacing them can make your whole outdoor living space look new—even if you don’t change anything else. 9) Style Tip: Keep Spring Decor Minimal at the Door For a polished look, concentrate spring decor in one main spot: the door. A greenery wreath and a simple arrangement on a side table (like a small potted plant and a candle lantern) reads intentional and not overdone. Summer: Bright Color, Easy Entertaining, and Comfort Summer patio decor is all about usability: cold drinks, shade, and seating that invites you to stay awhile. This is the season where your outdoor furniture earns its keep. 10) Create a Summer “Conversation Corner” If you have a smaller porch, two statement chairs plus a small table is the classic setup. Pair the Fan Back Outdoor Chair with a compact table to make the space feel like a destination rather than a pass-through. On a patio, consider expanding to a lounge zone. A chaise like the Outdoor Chaise Lounge Chair instantly signals summer and gives you a practical reason to use the space more often. 11) Summer Patio Decorating Ideas That Feel Effortless Use a garden flag for seasonal color: it’s the fastest way to brighten the yard line or porch edge. Keep tabletop decor low: a simple tray with citronella and a small plant keeps the table functional for snacks. Go bold with one accent: bright cushions or a patterned outdoor rug (if you use one) can carry the whole theme. Add a side table to every seat: nothing says “stay awhile” like a place to set a drink. 12) Style Tip: Choose Decor That Can Handle Heat and Sun Summer is when lower-quality accessories fade quickly. If your porch gets intense afternoon sun, lean into deeper accent colors and durable materials. This is another reason many homeowners prefer maintenance free outdoor furniture—less worry, more use. Fall: Cozy Layers, Warm Color, and Harvest Texture Fall is the season where seasonal outdoor decor really shines. You can make a porch look fully styled with a wreath, a few pumpkins, and warm lighting—without changing your furniture at all. 13) Build a Fall Porch Refresh Around Three Elements Wreath: choose a statement fall wreath for the door to anchor the look. Pumpkin grouping: cluster pumpkins near steps or by a chair leg for height and texture. Warm-toned lighting: lanterns or soft pathway lights make evenings feel cozy. For the door, the Custom Fabulous Fall Wreath gives you that “styled-by-a-pro” fullness and color variety. For the ground layer, the Country Harvest Pumpkin (2-Sizes) (3-Colors) is ideal for building a mixed-size cluster that looks natural and balanced. 14) Fall Patio Decor That Doesn’t Feel Overcrowded On a patio, it’s easy to add too many harvest items and lose the relaxing vibe. Keep the decor concentrated: One focal corner: pumpkins + lanterns + a small sign or planter. One tabletop moment: a shallow bowl of mini pumpkins or a simple wreath laid flat. Textiles do the rest: swap to warmer cushion covers and add a throw blanket if your climate allows. 15) Style Tip: Start Fall Earlier With “Transitional” Decor If you like decorating in late summer, start with muted pumpkins and warm neutrals before you go full harvest. That keeps your year-round outdoor decor feeling cohesive instead of abruptly themed. Winter: Evergreen, Glow, and Simple Structure Winter porch decorating ideas work best when they’re clean and classic. Think evergreens, strong silhouettes, and lighting that carries the look when it gets dark early. 16) Make Winter Decor Feel Intentional (Not Bare) Keep greenery on the door: a salal or evergreen wreath is the easiest winter anchor. Use lighting as decor: solar stakes, porch sconces, or lanterns add instant warmth. Emphasize symmetry: matching planters or lanterns at the steps read “designed” in winter. The 24" Salal Leaf Wreath w/ Custom Bow is especially useful here because it doesn’t feel out of place once holiday decor comes down—you can shift to a more neutral bow and keep the greenery through the end of winter. 17) Winter Patio Decorating That’s Practical If you get snow or heavy rain, keep winter patio decor elevated and secure. Focus on pieces that won’t blow away and decor that’s easy to wipe down. This is also when durable, maintenance free outdoor furniture can pay off—winter weather is hard on surfaces, and fewer materials to “baby” makes outdoor upkeep simpler. How to Mix Year-Round Outdoor Decor With Seasonal Swaps The secret to stress-free seasonal decorating is having a small set of pieces that stay out most of the year, then rotating just a few items per season. That prevents the “everything is themed” look and keeps storage manageable. 18) The Year-Round Core: What to Leave Out Outdoor furniture in classic shapes and neutral or foundation colors Side tables for function and styling flexibility Solar lighting or subtle landscape lighting One greenery wreath that can be updated with ribbon Planters (even if you change what’s inside them) 19) The Seasonal Capsule: What to Swap Door bow/ribbon (one of the simplest refreshes) Garden flag for quick color and theme One tabletop centerpiece (keep it low and functional) One ground-level grouping (pumpkins in fall, lanterns in winter, planters in spring/summer) Easy Layout Formulas for Any Size Porch or Patio If you’re unsure where to place things, use a layout formula. These work whether you’re styling a small front stoop or a larger patio. 20) Small Porch Formula (Stoop or Narrow Porch) Door: wreath One side: single chair or bench (if space allows) One surface: folding side table for a plant + candle Ground: one seasonal accent (pumpkins in fall or a lantern in winter) 21) Medium Porch Formula (Room for Seating) Seating: two chairs that face slightly inward Center: a small table or shared surface Layer: one extra side table for function Movement: wind chime or hanging decor near a corner 22) Patio Formula (Dining + Lounge) Zone 1: dining table as your anchor Zone 2: lounge chair or chaise + side table Connect zones: matching colors in cushions or accessories Frame the edge: solar stakes or planters to define the space What to Look for When Buying Outdoor Furniture (So It Lasts) Because outdoor furniture is the backbone of patio decor, it’s worth buying with long-term performance in mind. Here’s what experienced decorators and homeowners tend to prioritize. 23) Durability and Maintenance Level Ask yourself how much time you realistically want to spend on upkeep. If the answer is “almost none,” look for materials and finishes designed for outdoor exposure and consider maintenance free outdoor furniture that won’t demand constant sealing, staining, or touch-ups. Easy-care surfaces: wipe-clean tabletops and weather-friendly finishes Stable construction: furniture that won’t wobble after one season Comfort: if it’s not comfortable, it won’t get used—no matter how good it looks 24) Scale and Proportion Oversized furniture on a small porch makes the space feel cramped, while tiny furniture on a large patio can feel sparse. Measure before you buy and leave enough room for traffic flow—especially near a front door. 25) Versatility Across Seasons The best outdoor furniture works with multiple styles of seasonal outdoor decor. Neutral or classic silhouettes let you shift from bright summer patio decor to cozy fall porch decorating ideas without replacing big pieces. Small Details That Make Outdoor Decor Feel High-End These are the finishing touches that elevate an outdoor living space from “set out a couple chairs” to “designed.” They don’t require a big budget—just a plan. 26) Repeat Materials and Shapes If your chair has curved lines, echo that with rounded planters or a circular tabletop tray. If your furniture is more modern, keep accessories clean and simple. 27) Use Odd Numbers for Groupings When styling a table or step display, group items in threes or fives. For fall, that might mean two larger pumpkins and one smaller one. For winter, two lanterns and one small evergreen accent. 28) Keep One Surface Mostly Clear Especially on a patio, you want room for drinks, snacks, and everyday use. A common mistake in patio decorating is filling every surface with decor. Leave one main tabletop mostly open and concentrate your styling on side tables or a single tray. Seasonal Outdoor Decor Maintenance: Keep It Looking Great Even the best porch refresh can start to look tired if outdoor pieces get dusty, faded, or unstable. A few small habits keep your patio decor looking intentional all year. 29) Quick Weekly Reset (10 Minutes) Wipe tables and armrests Shake out mats (if you use one) Replace dead batteries or reposition solar lights Declutter: bring in cups, wrappers, and anything that doesn’t belong 30) End-of-Season Swap Routine (30–60 Minutes) Pack the seasonal capsule (flag, small accents, ribbons) Clean and store delicate decor that won’t handle weather well Refresh the wreath bow or swap the wreath seasonally Check furniture stability and tighten hardware if needed Shop-Smart Recommendations: Pieces That Do More Than One Job If you’re choosing what to upgrade first, prioritize items that improve function and style at the same time. These are the types of purchases that make year-round outdoor decor easier. An anchor table: the Outdoor Maintenance Free Table can act as a dining surface and a styling foundation in every season. Statement seating: the Fan Back Outdoor Chair adds charm to a porch and can be styled differently all year with cushion swaps. True lounging comfort: the Outdoor Chaise Lounge Chair turns a patio into a destination. Flexible small surfaces: the Outdoor Folding Side Table makes any setup more usable. Fast seasonal updates: the Summer Garden Flag is an easy swap that changes the mood instantly. Atmosphere builders: the Butterfly Garden Wind Chime and Solar Bird Garden Stake add personality without clutter. Door decor that spans seasons: the Salal Leaf Wreath adapts easily with ribbon changes; the Fabulous Fall Wreath anchors your fall look. Fall ground accents: the Country Harvest Pumpkin helps build an easy, layered step display. Putting It All Together: Your Year-Round Plan If you want a porch or patio that looks great without constant redecorating, focus on this rhythm: Invest in the base: comfortable outdoor furniture, a sturdy table, and at least one side table. Choose a year-round anchor: a versatile greenery wreath and simple lighting. Rotate a small seasonal capsule: a flag, a bow, one tabletop piece, and one ground-level grouping. Maintain with quick resets: a little consistency keeps seasonal outdoor decor looking intentional. With these outdoor decor ideas, patio decor becomes easier to update, porch decorating ideas feel less overwhelming, and your outdoor living space stays welcoming in every season.
Learn more
How to Create a Bird-Friendly Garden with Feeders, Houses, and Yard Decor
Why a Bird-Friendly Garden Is More Than “Putting Out a Feeder” A true bird friendly garden is a small ecosystem: food, fresh water, safe cover, and (when possible) nesting sites. When those pieces work together, you’ll notice more consistent visits, greater variety of species, and a more enjoyable bird watching garden, not just quick “grab-and-go” stops. The good news: you don’t need acreage or complicated landscaping to create a backyard bird habitat. With a few well-chosen bird feeders, one or two well-placed bird houses, and thoughtfully selected yard decor, you can start attracting birds to yard spaces of almost any size, patios, suburban lawns, cottage gardens, and even townhouse courtyards. Start With the Basics: What Birds Need (and What They Avoid) Food sources (and variety) Different birds prefer different food types and feeder styles. If you only offer one seed blend in one feeder, you’ll mostly attract the species that can use that exact setup. Variety increases the chance of variety. Seed eaters (finches, chickadees, cardinals): sunflower seed, safflower, quality blends with minimal filler Ground feeders (doves, juncos): spilled seed, millet in moderation, open tray areas Nectar feeders (hummingbirds): sugar-water in safe, easy-to-clean hummingbird feeders Insect-focused birds (wrens, swallows, bluebirds): benefit most from native plants and pesticide-free yards Water (often the biggest “multiplier”) If you want fast results, add water. Birds use water for drinking and bathing, and many will visit a yard just for a reliable, clean source. In hot weather and during migration, water can be even more attractive than food. Cover and safety Birds love quick access to shelter—shrubs, small trees, and even tall grasses—because it lets them retreat if a hawk passes or a neighborhood cat appears. A feeder placed in the middle of a wide-open yard can feel risky. The goal is to provide nearby cover without giving predators an easy hiding place right under the feeder. Nesting opportunities (where appropriate) Bird houses can help cavity-nesting species, but they don’t automatically guarantee babies. Placement, correct hole size, seasonal timing, and predator protection matter. Some birds simply won’t use houses in certain neighborhoods, and that’s okay—your garden can still be an excellent habitat. Choosing Bird Feeders: What to Buy and Why It Matters Shopping for the best bird feeders can get overwhelming because “cute” doesn’t always mean “effective.” For a feeder to perform well, it needs to be easy to fill, easy to clean, and appropriate for the birds you want to see. 1) Hopper and house-style feeders (great for everyday songbirds) Hopper-style feeders hold a good amount of seed and attract a broad mix of birds. They’re also a natural fit for gardens where decor matters, because they can look like small architectural accents. If you like a clean, modern look that still feels warm and natural, consider theSmall Modern Wood Bird Feeder (3-Styles). It’s a good option for a decorative-yet-functional setup, especially near patios where you want a tidy silhouette. Best for: cardinals, chickadees, titmice, finches, nuthatches Pros: capacity, broad appeal, visually pleasing Watch for: seed staying dry; clean-out access 2) Decorative bird feeders that still earn their spot It’s possible to have a feeder that looks like yard decor and still feeds birds effectively. The key is making sure it’s not overly hard to clean and that it protects seed from prolonged dampness. For a color-forward accent, theMosaic Glass Birdfeeder (4-Colors) can add sparkle in a garden bed or near outdoor seating—especially in morning or late-afternoon light. It’s an easy way to incorporate decorative bird feeders into your overall styling without sacrificing the joy of regular bird activity. Best for: general seed-eaters depending on perch style and seed choice Pros: strong visual impact; doubles as decor Watch for: place where you can monitor cleanliness and refill comfortably 3) Hummingbird feeders: pick the one you’ll actually keep clean Hummingbirds are often the “gateway” to building a bird garden. They’re bold, consistent, and fun to watch from a window or porch. But nectar feeders require the most consistent maintenance—so choosing a design you’ll enjoy using matters. Two solid options to consider: Hummerfest Hummingbird Feeder (2 Sizes) for a classic feeder setup that can suit different yard sizes. Hummingbird Flower Feeder if you want a floral look that blends into garden plantings and adds a decorative note. Nectar recipe: Use plain white granulated sugar and water only (mix 1 part sugar to 4 parts water). Heat water to dissolve if you prefer, then cool fully before filling. Avoid red dye. Many feeders already include red accents that attract hummingbirds. Cleaning schedule: In hot weather, plan to clean and refill every 2–3 days (more often if the feeder is in full sun). In cooler weather, every 4–7 days can work. If nectar looks cloudy, dump it and clean immediately. 4) Tray feeders and “mess management” Tray feeders can bring in ground feeders and birds that prefer open access. They can also increase seed debris. If your goal is a neat patio or curated garden look, place tray feeders farther from main seating and add a simple “clean zone” plan (more on that below). Where to Put Feeders for More Birds (and Better Viewing) Feeder placement is one of the most overlooked bird garden ideas, and it affects everything: how safe birds feel, how often you’ll see them, and how easy it is to keep things clean. A practical placement checklist Visibility for you: Place feeders where you’ll actually look—near a kitchen window, reading chair, or patio table. Safety for birds: Put feeders within 10–15 feet of cover (shrubs or small trees), but not so close that cats can hide beneath them. Reduce window strikes: If a feeder is near glass, place it very close (within about 3 feet) or farther away (30+ feet). Close placement can reduce impact speed if a bird bumps the window. Sun and shade balance: Some shade helps seed and nectar last longer. Full sun can speed spoilage, especially for nectar. Wind considerations: Avoid the windiest corner of the yard where seed gets wet or blown out. Create “stations” instead of a single cluster One crowded feeder can lead to bullying and fewer species. A better approach for attracting birds to yard spaces is to create two or three small stations: Songbird station: hopper/house feeder + (optional) suet in winter Hummingbird station: nectar feeder near flowers and a viewing spot Water station: bird bath or shallow basin, ideally with gentle movement Spacing stations out reduces competition and gives you multiple viewing angles—great for a true bird watching garden. Bird Houses: How to Choose, Place, and Style Them Bird houses add charm to a garden, but to be truly helpful they must match the needs of cavity-nesting birds. If your goal is both function and style, you can absolutely do both—just treat decorative houses as decor unless they meet key specs (ventilation, drainage, clean-out access, correct hole size). What to look for in a functional bird house Drainage holes to prevent damp nests Ventilation near the top for summer heat Clean-out access for end-of-season maintenance Correct entrance hole size for the species you want to support Untreated or bird-safe materials (avoid strong chemical smells or fresh paint inside) Placement basics (so birds actually use them) Height: Many common backyard species prefer houses 5–12 feet high; some species require higher placement. Direction: Face the entrance away from prevailing wind and harsh afternoon sun when possible. Spacing: Don’t place multiple houses too close together unless the species tolerates it. Predator protection: Use baffles if mounting on poles; avoid locations that allow easy access for cats or raccoons. Decor-forward birdhouses that elevate your garden style If you want birdhouse charm as part of your garden vignette, there are options that look beautiful tucked among planters, hung on a shepherd’s hook, or displayed on a sheltered porch wall. Small Supermoss Birdhouse (4-Styles) works well for adding natural texture to a planting bed or container cluster. Whitewashed Wooden Birdhouse pairs nicely with cottage, coastal, and farmhouse garden palettes. If you’re using a birdhouse primarily as decor, place it where it looks intentional and won’t confuse birds during nesting season. If you want it to function as housing, prioritize the checklist above and consider placing it a bit farther from high-traffic human areas. Water Features Birds Love: Bird Baths and Simple Upgrades Clean water is one of the fastest ways to make your yard feel like a reliable backyard bird habitat. Birds will often return daily once they learn they can count on your water source. Choosing a bird bath Look for a basin that’s easy to clean and stable enough not to tip. A textured surface helps birds grip. Many birds prefer shallow water (1–2 inches), or a deeper basin with stones added to create shallow edges. A classic, elevated option like theMetal Bird Bath w/ Stand (2-Styles) can serve as both a focal point and a functional stop for birds, especially when placed near shrubs for quick shelter. Make water more attractive with movement Birds notice sound and sparkle. If you can add gentle movement, like a small dripper, bubbler, or even the trickle of a hose for a few minutes, you’ll usually see more visitors. Movement can also help reduce mosquito breeding. Cleaning and safety Refresh often: Daily is ideal in hot months; every few days at minimum. Scrub weekly: Use a stiff brush. Skip harsh chemicals. If needed, a mild vinegar-water solution can help with grime (rinse thoroughly). Winter note: In cold climates, consider a heater designed for bird baths so birds have access when natural water sources freeze. Yard Decor That Supports Birds (Without Turning Your Yard Into a Theme Park) Decor can do more than look pretty. It can help define “zones,” offer perching spots, and make your garden feel finished. The trick is to choose pieces that complement nature rather than overpower it. Use stakes and vertical elements to create structure Vertical decor helps you build a layered look—especially in smaller yards—while giving birds perches and creating visual boundaries between feeding and lounging areas. Tall Metal Birdhouse Stake (2-Styles) adds height and a playful focal point in beds where you want a little whimsy. Copper Finish Powder Coated Iron Birdhouse Stake (6-Styles) can warm up garden tones and pair nicely with natural stone, mulch, and greenery. Add sound carefully Some birds aren’t bothered by gentle, occasional sound, while others may be more cautious. If you love wind chimes, place them near seating areas rather than right beside feeders or nesting zones. TheButterfly Garden Wind Chime can be a sweet finishing touch for a pollinator-and-bird garden theme, especially when positioned so it doesn’t clang constantly in heavy wind. Decor rules of thumb for a bird-friendly look Choose a cohesive material palette: wood + metal + glass can look curated if you repeat each element. Keep sightlines open: Too many tall items near feeders can make birds nervous. Prioritize easy maintenance: Anything near seed or water should be simple to wipe down. Planting for Birds: The “Free Food” That Makes Everything Work Better If feeders are the quick win, plants are the long game. Adding the right plants reduces your dependence on constant refilling and creates a more resilient bird friendly garden. Focus on three plant jobs Shelter: evergreen shrubs, dense native bushes, ornamental grasses left standing through winter Natural food: seed heads, berries, and nectar flowers Insects: native plants support caterpillars and insects that many birds need, especially when feeding young Easy bird garden ideas using common plant types Berry producers: plant one or two shrubs that hold berries into fall and winter Seed heads: leave some coneflowers, black-eyed Susans, and ornamental grasses uncut until spring Tubular blooms: include a cluster of nectar-rich flowers near your hummingbird feeders to encourage lingering visits If you prefer a tidy look, you can still support birds: simply dedicate one “wild corner” or back border where seed heads remain and leaf litter is lightly managed. Seasonal Strategy: What to Offer and When Bird needs shift with temperature, migration, and nesting. A seasonal plan keeps your backyard bird habitat reliable and helps you spend smarter on food and supplies. Spring Goal: support nesting and early migrants Offer: quality seed; fresh water; nectar for early hummingbirds Tip: avoid heavy yard chemical use—spring insects are essential bird food Summer Goal: hydration and shade Offer: extra water sources; nectar refreshed frequently Tip: keep feeders clean to prevent mold and illness Fall Goal: fuel migration and prepare for cold Offer: consistent seed; consider higher-energy options Tip: refresh decor and add structure—stakes, birdhouse accents, and focal points look especially good in fall beds Winter Goal: reliable calories and accessible water Offer: sunflower seed; protected feeding areas; unfrozen water if possible Tip: keep a small shovel path so you can refill without slipping or compacting planting beds Keeping It Healthy: Cleaning, Food Quality, and Common Problems A busy feeder is fun—until you realize it’s also a gathering place. Cleanliness and good food reduce the risk of disease and keep birds returning. Feeder cleaning routine (realistic and effective) Every refill: dump old seed hulls; wipe visible grime; check for clumps or moisture Every 1–2 weeks: wash feeders with warm soapy water; rinse and dry fully After rain: check for wet seed; remove anything damp or moldy immediately For hummingbird feeders, clean more often as noted earlier—especially in warm weather. Choose better seed (it matters) Inexpensive blends often include fillers many birds toss out (like red millet in some regions). That creates more mess under your feeder and can attract unwanted guests. Higher-quality seed may cost more upfront but often results in less waste and more bird activity. How to handle squirrels and “feeder bullies” Move feeders: keep them away from launch points like fences and low branches Use placement as a tool: separate stations so aggressive species can’t guard everything Keep the ground tidy: less spilled seed means fewer rodents and less lingering If you love the look of open, decorative feeders, consider pairing them with a second feeder type placed a bit farther away, so birds have options if one spot becomes crowded. Designing a Beautiful Bird Watching Garden: Layout Ideas That Feel Intentional Many people want birds, but they also want a yard that looks styled. You can absolutely have both. Think like a designer: create focal points, repeat materials, and make “rooms” in the landscape. Bird garden layout idea: The “window-view triangle” Point 1: a primary feeder you can see easily from indoors Point 2: a bird bath as a focal point in a bed or lawn edge Point 3: a hummingbird feeder near flowers and a comfortable outdoor seat This creates movement and interest for you, while giving birds multiple safe options. Add one decorative stake to anchor each point visually, and your yard will look planned rather than “random items placed where there was space.” Bird garden layout idea: The “decor-first patio border” Place a decorative bird feeder near the patio edge for close viewing. Add a second feeding station farther out to reduce crowding. Use one tall stake element to add height and tie the look together. This approach is especially effective for smaller yards where you want birds close, but not so close that seed mess affects your main seating area. Product Picking Guide: Match the Feeder or Decor to Your Goal If you’re deciding what to buy first, use your goal as the filter. The “best” choice depends on what you want to see and how you want your garden to feel. If you want more everyday backyard birds Start with: a versatile seed feeder + water Consider: Small Modern Wood Bird Feeder (3-Styles) Add next: a bird bath likeMetal Bird Bath w/ Stand If you want hummingbirds (and you want them close) Start with: one easy-to-monitor nectar feeder near a viewing spot Consider: Hummerfest Hummingbird Feeder or theHummingbird Flower Feeder Add next: tubular flowers and a second water source If you want a curated, decorative garden that still functions for birds Start with: one standout feeder that doubles as decor Consider: Mosaic Glass Birdfeeder (4-Colors) Add next: a vertical accent likeCopper Finish Powder Coated Iron Birdhouse Stake and a bird bath focal point If you’re building a “garden vignette” with birdhouse charm Start with: one decorative birdhouse placed intentionally in a bed or container cluster Consider: Whitewashed Wooden Birdhouse orSmall Supermoss Birdhouse Add next: keep functional feeding/water nearby, but not directly under heavy decor Common Mistakes to Avoid (So You Get Results Faster) Putting everything in one spot: stations work better than a single crowded corner. Neglecting water: a feeder-only yard often attracts fewer species than a yard with water. Using dyed nectar or honey: stick to simple sugar water for hummingbirds. Letting seed get wet: wet seed can mold quickly; check after storms. Over-decorating the feeding zone: too many moving or shiny objects right beside feeders can make birds skittish. A Simple 7-Day Plan to Launch Your Backyard Bird Habitat If you want a clear starting point, here’s a practical one-week approach that balances shopping decisions, setup, and good bird care. Day 1: Choose your main viewing window or seating area; sketch a simple layout (feeder, water, cover). Day 2: Install your first feeder and place it with safety and window considerations in mind. Day 3: Add a bird bath; place it where you can easily refresh water. Day 4: Add a second station (hummingbird feeder or a second seed feeder) to reduce crowding. Day 5: Add one vertical decor element (stake or birdhouse accent) to “finish” the look. Day 6: Clean up the ground beneath feeders; decide if you want a mulch or gravel “clean zone.” Day 7: Observe what shows up, then adjust: slightly shift placement, add cover plants, or change seed type. Bring It All Together: A Garden Birds Will Return to The most successful bird friendly garden is the one that stays consistent: clean food, fresh water, safe placement, and a bit of shelter. Add in a few design-forward touches—like a decorative feeder, a well-placed bird bath, and a vertical stake—and your yard becomes both a welcoming backyard bird habitat and a beautiful extension of your home. Once your stations are established, you’ll find that attracting birds to yard spaces becomes less about constant effort and more about small, satisfying routines—refilling, refreshing water, and enjoying the daily activity that turns an ordinary view into a true bird watching garden.
Learn more
How to Protect Outdoor Decor from Sun and Weather Damage
Outdoor decor works hard. It sits in direct sun, gets soaked by rain, bakes on hot patios, freezes overnight, and sometimes takes a beating from wind-blown grit or sprinklers. Over time, that exposure shows up as fading paint, chalky finishes, rust spots, cracked resin, cloudy glass, or fountain pumps that struggle after a season of debris. The good news: you can protect outdoor decor without turning it into a high-maintenance hobby. The key is understanding what actually causes damage (UV light, moisture, temperature swings, salts, and abrasion) and then matching simple protection steps to the material you own. Below are practical, experience-based outdoor decor tips you can use to extend the life of yard art, garden statues, spinners, bird baths, and fountains—while keeping them looking the way you bought them. Why outdoor decor gets damaged: the 5 main culprits UV light (sun exposure): UV breaks down pigments and binders in paint and coatings. It causes fading, chalking (a dusty residue), brittleness, and loss of gloss. If you’re trying to prevent sun damage outdoor, UV management is the first priority. Water and humidity: Moisture drives rust on metal, encourages mineral deposits on fountains, and can swell or crack porous materials. Freeze-thaw cycles: Water expands as it freezes. If water sits in tiny pores or cracks, it can widen them, leading to chips and fractures—especially in concrete, terracotta, and some resins. Wind and abrasion: Windblown dust and sand act like sandpaper. Constant movement can also loosen fasteners on spinners and stakes. Chemicals and salts: Pool chemicals, fertilizer overspray, de-icing salts, and even hard-water minerals can stain and degrade finishes. Start with smart placement (the easiest protection you’ll ever do) Before you buy sprays, sealers, or replacement parts, take a fresh look at where decor lives. Small placement changes can dramatically reduce exposure. Use partial shade strategically: Morning sun is generally gentler than intense afternoon sun. Placing items where they get a break during peak UV hours is one of the best ways to protect outdoor decor. Avoid sprinkler zones: Regular sprinkler spray keeps surfaces constantly damp, speeds rust, and leaves mineral spots. If you can’t avoid sprinklers, adjust heads so decor doesn’t get hit directly. Keep decor off bare soil when possible: Constant ground moisture contributes to rust and staining. Use pavers, gravel, or a small base for metal and porous materials. Shelter from wind tunnels: Between buildings or at corner gust points, spinning decor can wear faster and stakes can loosen. A few feet of relocation often helps. Your outdoor decor maintenance toolkit You don’t need a workshop to maintain yard art. A small kit makes seasonal care quick and consistent. Soft microfiber cloths and a soft brush for crevices Mild dish soap (avoid harsh degreasers unless the manufacturer recommends them) Non-abrasive sponge for bird baths and painted metal White vinegar (diluted) for mineral deposits on fountains and glass (use carefully; test first) Rust removal pad or fine steel wool for raw metal spots (use gently and only where appropriate) Touch-up paint matched to your decor (especially for metal edges) UV protectant spray appropriate to the material (more on choosing one below) Clear protective topcoat (outdoor-rated) when needed Silicone lubricant (for moving spinner parts, used sparingly) Gloves and a small screwdriver set for tightening hardware Choosing a UV protectant spray (and when it actually helps) A UV protectant spray can be useful, but it’s not a magic force field. It works best when it’s compatible with the surface, applied correctly, and refreshed before the coating breaks down. What to look for Outdoor-rated and UV-inhibiting: Look for labels that mention UV inhibitors or UV resistance and that the product is intended for outdoor use. Material compatibility: Plastics/resins, painted metal, bare metal, sealed stone, and glass all behave differently. A coating that’s great for metal may haze on certain plastics. Finish match: Matte, satin, and gloss options help you avoid altering the look. Matte decor often looks best with a matte UV layer. Non-yellowing formulation: Especially important for light colors, whites, and clear components. When to use it Painted metal yard art: A UV-protective clear coat can slow fading and reduce chalking. Resin and plastic decor: UV protection can reduce brittleness and color loss over time. Brightly painted statues: Especially those in full sun. When to skip it (or test first) Powder-coated finishes: Many powder coats already have durability; adding an incompatible top layer can peel later. If you do coat, clean thoroughly and test a hidden area first. Highly textured or already-flaking paint: Spraying over failing paint can trap moisture and speed peeling. Prep first. Glass and glazed ceramics: UV sprays rarely add meaningful benefits and may cause haze. How to apply UV protectant spray the right way Clean first: Wash with mild soap and water, rinse well, and let it dry completely. Coatings fail fast on dusty or damp surfaces. Light sanding only if needed: For glossy paint that won’t accept a coat, a very light scuff can help. If you’re unsure, don’t sand—test instead. Apply thin coats: Multiple light passes beat one heavy coat, which can run, cloud, or trap solvents. Respect cure time: “Dry to touch” is not “fully cured.” Keep it out of dew and rain until cured. Reapply on a schedule: In harsh sun, plan to refresh seasonally or as soon as you notice dulling or chalking. Weatherproof outdoor decorations by material Different materials fail in different ways. Use the sections below as a targeted guide for weatherproof outdoor decorations you already own. Metal garden art care: stop rust before it spreads Metal is popular outdoors because it’s strong, detailed, and decorative. The downside is oxidation: once a coating is nicked, rust can begin at the exposed edge and creep under the finish. Good metal garden art care focuses on keeping water off bare spots and repairing chips early. Routine cleaning for painted or powder-coated metal Wash gently: Mild soap, soft cloth, rinse well. Avoid abrasive pads that scratch coatings. Dry after washing: Leaving water to air-dry can cause spotting and encourages corrosion where coatings are thin. Inspect edges and joints: Rust often begins where panels meet, around welded seams, and at stake insertion points. How to treat small rust spots Remove loose rust: Use a rust removal pad or fine steel wool carefully. Don’t gouge surrounding paint. Clean and dry: Wipe away dust, then dry completely. Prime if needed: For exposed bare metal, a rust-inhibiting primer helps. Touch up paint: Cover the repair area. Thin layers look better and last longer. Seal: Consider a compatible clear coat, especially on high-exposure items. Protect yard art with moving parts (spinners and stakes) Wind spinners and kinetic stakes are especially vulnerable because motion creates friction and loosens hardware. A simple maintenance habit keeps them spinning smoothly. Tighten hardware: Check screws and nuts every few weeks during windy seasons. Keep bearings clean: Dust and grit can grind away coatings. Use minimal lubricant: A tiny amount of silicone lubricant on a pivot point can help. Wipe away excess so it doesn’t attract dirt. Pull them during storms: If severe weather is coming, bringing items in prevents bent spindles and snapped stakes. If you have kinetic pieces like a Double Spiral Wind Spinner (2-styles) or a 37" Metal Spinning Flower Garden Stake (4-Colors), these steps are especially valuable because small alignment issues can worsen quickly after one hard wind event. Caring for garden statues: resin, concrete, stone, and ceramic Caring for garden statues starts with identifying the material. Statues often look similar at a glance, but their maintenance needs are very different. Resin and plastic statues (lightweight, detailed, UV-sensitive) Prevent sun damage outdoor: Place in partial shade when possible. Resin can fade and become brittle in constant full sun. Clean gently: Mild soap and water, soft brush for details. Avoid solvents. Use a UV protectant spray: A plastic-safe, non-yellowing UV protectant can slow fading. Test on the underside first. Watch for hairline cracks: Seal early before water gets inside and freeze-thaw expands it. Concrete, cement, and cast stone (heavy, porous, freeze-thaw risk) Keep off saturated ground: Use pavers or a base to reduce constant moisture wicking. Seal when appropriate: A breathable, penetrating sealer can reduce water absorption. Avoid glossy surface films that can trap moisture and peel. Winter strategy matters: In freezing climates, moving porous statues under cover (garage, shed, porch) can prevent cracking. Terracotta (beautiful, but fragile in cold) Bring inside for winter: Terracotta absorbs water and is prone to cracking in freezes. Use a breathable sealer: If you keep it outdoors, choose a sealer designed for clay/terracotta. Glazed ceramic (color-stable, but chips easily) Avoid impacts: Place where it won’t be knocked by hoses, pets, or lawn tools. Watch for chips: Exposed ceramic bodies can absorb water. Touch up chips with an outdoor-safe sealant if possible. For figurines like a Pebbles Garden Figurine (2-Styles), gentle cleaning and smart placement (away from sprinklers and direct afternoon sun) often do more than heavy coatings. Fountain maintenance: protect pumps, finishes, and water quality Outdoor fountains are constantly exposed to water, so they need a different kind of attention. Good fountain maintenance prevents pump failure, staining, algae buildup, and winter cracking. Weekly quick checks (5 minutes) Maintain water level: Pumps burn out when they run dry, which can happen quickly in heat or wind. Remove debris: Leaves and petals clog intakes and stain basins. Listen for changes: A louder pump often signals low water or a clog. Monthly cleaning (or more often in heat) Unplug the fountain: Always start with safety. Rinse and wipe: Use a soft cloth and mild soap for most finishes. Descale mineral buildup: If you have hard water, a diluted vinegar solution can help remove calcium deposits. Test first and avoid prolonged soaking on sensitive finishes. Clean the pump: Remove the intake cover and rinse out grit. A clogged pump works harder and fails sooner. Refill with fresh water: This reduces odor and residue. Algae and water clarity tips Use distilled or filtered water when possible: It reduces mineral staining. Limit fertilizer drift: Nutrients feed algae. Keep fountains away from heavy feeding zones and overspray. Balance sun exposure: Full sun encourages algae growth. Partial shade often helps. Cold-weather fountain protection Drain before freezing: Standing water can crack basins and lines. Store the pump indoors: Clean it, dry it, and keep it somewhere it won’t freeze. Cover or store the fountain: If it’s not designed for winter operation, move it under cover or use a breathable cover. If you’re maintaining a metal-and-light feature like the LED Metal Floral Fountain (3-Sizes), focus on keeping electrical components dry during cleaning, wiping down metal after rinsing, and staying consistent with pump debris checks. Glass, mosaic, and painted finishes: prevent clouding and chips Glass and mosaic decor can handle sun well, but it can suffer from mineral film, grime buildup, and chipping at edges. The goal is to keep surfaces clean without scratching them. Wash gently: Mild soap and a soft cloth. Avoid abrasive powders or rough pads. Remove mineral spots: A diluted vinegar wipe can help on glass. Rinse thoroughly. Check grout or adhesive areas: If you notice loose mosaic pieces, fix early before water intrusion expands the problem. For items like a Mosaic Glass Birdfeeder (4-Colors), regular rinsing and keeping it out of constant sprinkler spray reduces spotting and keeps colors bright. Bird baths and feeders: protect the decor and keep them safe for wildlife Bird baths and feeders have two jobs: look good and function safely. Outdoor decor maintenance here should avoid residues that could affect birds. Metal bird bath care Rinse often: Frequent rinses reduce algae and staining without harsh cleaners. Scrub with a soft brush: If needed, use mild soap and rinse very thoroughly. Check for rust at seams: Touch up early to prevent flaking. If you have a Metal Bird Bath w/ Stand (2-Styles), keeping the basin clean and drying the stand after heavy rain can help prevent water sitting in joints and protect the finish. Seasonal routine: simple schedule that prevents big damage Most weathering problems don’t happen overnight. A light schedule helps you catch issues early. Spring reset (after winter or rainy season) Wash everything: Remove grime, pollen, and residue so you can see the true condition. Inspect for damage: Look for chips, cracks, rust, and loose hardware. Touch up and seal: Address small paint chips before humid summer weather accelerates rust. Restart fountains: Clean pumps, flush basins, and check cords and plugs. Summer protection (sun and heat) Reinforce UV strategy: Move sensitive pieces to partial shade if fading starts. Use UV protectant spray as needed: Especially on resin/plastic and painted finishes that get direct sun. Check water features weekly: Evaporation is fastest in heat. Fall prep (wind, leaves, temperature swings) Clear leaves from fountains and bird baths: Tannins can stain surfaces and clog pumps. Tighten spinners and stakes: Windy weather loosens fasteners. Plan what will be stored: Decide now which pieces come in before first freeze. Winter protection (freeze, ice, and storage) Store what you can: Resin statues, terracotta, and many fountains last longer indoors. Use breathable covers: Avoid sealing moisture in with plastic tarps directly against surfaces. Lift items off the ground: If decor stays outside, raise it to reduce moisture contact and ice bonding. How to weatherproof outdoor decorations without overcoating It’s tempting to spray everything with a thick clear coat and call it done. But the most common coating failures outdoors come from poor prep and incompatible products. Use coatings as targeted tools, not a blanket solution. Clean and dry is non-negotiable: Trapped moisture leads to clouding, peeling, and corrosion under the film. Match the coating to the surface: Use products designed for the specific material and finish type. Avoid sealing in damage: If paint is flaking, remove loose areas and stabilize first. Respect temperature and humidity: Many sprays and sealers fail when applied in high humidity or extreme heat/cold. Troubleshooting: common outdoor decor problems and what to do Fading colors on metal or resin Move to partial shade during peak afternoon sun. Clean thoroughly to remove chalky oxidation. Apply a compatible UV protectant spray or UV-resistant clear coat after testing. Chalky residue on painted surfaces Wash with mild soap and a soft cloth. Rinse well and dry to prevent streaks. Consider a UV-stable topcoat if the surface is otherwise in good condition. Rust bleeding from seams or edges Dry the piece and locate the source (often a tiny chip at an edge). Remove loose rust, prime, touch up paint, and seal if appropriate. Improve drainage by repositioning so water doesn’t pool at the base. Fountain pump running weak Check water level first; low water is the most common cause. Clean the intake and remove debris. Descale if needed if mineral buildup is present. Cracks in statues after winter Dry thoroughly and keep water out while you evaluate. Repair small cracks early with appropriate filler or sealant for the material. Change winter storage strategy next season: bring indoors or elevate and cover with breathable protection. Protecting specific types of yard art (quick guidance) If you want a fast way to match protection to decor type, use this as a reference. Metal stakes and critters: Keep off saturated soil, touch up chips quickly, and rinse after fertilizer applications. Example: Garden Critter Metal Stake (3-Styles). Large painted metal silhouettes (birds, herons, etc.): Inspect welds and edges, rinse away salts, and consider a UV-stable clear coat if fading is noticeable. Example: Set of 2 Blue Metal Herons. Spinners: Tighten, clean, and protect moving points from grit; bring in during extreme storms. Figurines and statues: Prioritize shade and freeze protection; use breathable sealers for porous materials. Water features: Focus on pump care, mineral control, and winterizing. Best practices that make everything last longer Handle with clean hands: Sunscreen and oils can stain some finishes and attract dirt. Lift, don’t drag: Dragging chips paint and breaks glaze at edges. Keep a touch-up habit: Small chips become large rust spots when ignored. Document what you use: If you find a clear coat or UV spray that works well for a piece, note it so reapplication stays consistent. Don’t mix chemicals casually: Avoid combining cleaners on fountains and bird baths. Rinse thoroughly between products. Putting it all together To protect outdoor decor for the long term, think in layers: start with placement (shade, drainage, less sprinkler spray), keep up with light cleaning, and only then add targeted protection like touch-up paint, breathable sealers, or a compatible UV protectant spray. This approach helps prevent sun damage outdoor while also reducing rust, cracking, and water-related wear. With a simple seasonal routine and quick check-ins after storms or heat waves, most decor, whether it’s delicate figurines, bold metal yard art, or a centerpiece fountain, can stay bright, stable, and ready for the next season.
Learn more
How to make a beautiful spring wreath
We're known for making beautiful custom wreaths, and today, we're going to share those secrets with you! Learn how to make a DIY wreath, perfect to hang on your door this spring.
Learn more
The Most Realistic Artificial Flowers You Can Buy
The Last Straw has been bringing realistic artificial flowers into people's homes for over 31 years now. In that time, we've found one brand in particular that people adore! Flowers from this brand look and feel incredibly realistic, and our customers keep gravitating toward them. That brand is...
Learn more